In this guide, I’ll walk you through exactly How to Set Up a Call-In Show for Podcasting, whether you want to record calls privately, go live on YouTube, or even do a hybrid mix.
I’ll be honest—the first time I tried to host a call-in show for my podcast, it was a total disaster.
I thought I could just plug in my phone, hit record, and boom—instant audience engagement.
Instead,
I got an echoing mess, people accidentally talking over each other, and worst of all, one caller who shouted their SoundCloud link 12 times before I could figure out how to mute them.
But after a few late nights tinkering with gear and testing software loops, I finally cracked the code.
If you’ve ever wondered how to set up a call-in show for podcasting that actually sounds professional and doesn’t make you want to throw your mic across the room, this guide is for you.
Setting up a podcast call-in system isn’t just for radio pros with fancy gear or live talk shows with full-on control rooms.
You can do it from your home studio—or even your laptop—if you understand the right combo of gear, software, and workflow.
And honestly, there’s a lot of bad advice out there. I saw one YouTuber recommend using speakerphone and holding the mic up to it. 😬
Please don’t do that unless you’re podcasting from 2007.
Here’s the cool part though: integrating real-time interaction into your podcast can skyrocket listener loyalty.
According to Edison Research, listeners are 2.6x more likely to return to podcasts that include audience participation, especially call-ins or voicemails.
Plus,
it reduces your content workload—you get authentic, unpredictable content that’s often more engaging than anything scripted.
I started with simple voicemail drops using Google Voice, but once I switched to Cleanfeed and added Voicemeeter for audio routing, the difference was wild—callers actually sounded like guests, not distant robots drowning in static.
That said, I did rage quit on Loopback during the first setup because it kept rerouting my mic through Safari instead of the app.
The learning curve is real—but so is the payoff.
Trust me—you don’t need a $2,000 mixer or an engineer in the next room. Just a few smart moves, the right tools, and a willingness to test before going live. Let’s dive in. 🎧
Can You Even Do a Call-In Podcast? (YES, and Here’s How)
You don’t need a live studio or even a co-host.
If you have a decent home setup with a Rodecaster Pro, there are multiple ways to host a call-in segment—live, pre-recorded, or hybrid.
And if you’re thinking only big networks can pull it off, let me remind you that podcasts like The Daily Zeitgeist and Reply All regularly use remote guests and live call-ins with nothing but VoIP services, software routing, and smart planning.
You’re already halfway there if you’ve done a Zoom interview.
📞 Call-In Podcast Models That Work (Even Solo)
- Live Call-In Episodes: This is the classic style—recording live, maybe even broadcasting it on YouTube or Twitch, while letting listeners dial in. I started with this using Google Voice and OBS, and though it was chaotic at first, it added insane energy to the show. If you love spontaneity and don’t mind the occasional prank call (“Is your refrigerator running?” was a real one 😐), go for it.
- Pre-Recorded Call-In Segments: My favorite setup. Listeners leave voicemails or pre-scheduled calls which I edit into the episode later. Zero chaos, and I can clean up audio, cut the awkward silences, or remove someone chewing mid-question (yes, that happened).
- Panel Shows with Open Lines: If you’re co-hosting or running a community-based show (think Discord or Reddit fanbase), opening up call-ins during a live group episode can create magic. But trust me, you’ll want a screener—at least a friend on mute in the background who can message you, “Caller 2 sounds drunk.”
Most importantly,
you don’t have to choose between live or pre-recorded—you can absolutely blend both.
I often start an episode with polished commentary and sprinkle in recorded caller clips, then do a short live AMA segment using Cleanfeed or Riverside.fm at the end.
Speaking of which,
Riverside has a cool feature that lets guests join with studio-quality audio even from a phone—
but beware,
if the caller’s connection is weak, the sync delay will give you a podcast version of a dubbed kung-fu movie.
Another thing I learned the hard way:
your podcast host doesn’t matter here—
Anchor, Buzzsprout, Libsyn, whatever—you just need to record clean audio, and your hosting platform will take anything you throw at it. The magic happens in your routing and recording flow, not the publishing.
Oh, and if you’re worried about legal stuff—roughly 38 U.S. states only need single-party consent to record calls (meaning you being in the conversation is enough),
but some like California and Florida require all parties to consent.
Always best to say something like, “This call may be recorded for the podcast” upfront.
According to Digital Media Law Project, not doing so can land you in hot water—even if your show only has 50 listeners.

What You Need to Set Up a Call-In Show (No Fluff)
When I first thought about turning my podcast into a call-in show, I assumed I’d need some radio-station-grade gear and a dozen interns.
Spoiler: I was so wrong.
Setting this up is easier than you think—but only if you use the right combination of hardware and software, and avoid the traps I fell into during my first few failed attempts (one time, I routed my own voice back into the call and scared the poor caller with a ghost echo 😅).
Let’s break it down.
🛠️ A. Essential Hardware (No, You Don’t Need to Spend $2000)
You absolutely do not need a fancy mixer unless you already have one.
What you do need is an audio interface—something like the Focusrite Scarlett 2i2 or the MOTU M2, which gives you clean audio and lets you route both your mic and caller audio easily.
But here’s the kicker:
not all interfaces handle mix-minus natively (that’s the trick where your caller hears your voice but not their own echo).
So unless you’re using something like the Rode Rodecaster Pro, which has mix-minus built-in and works like a dream, you’ll need software help.
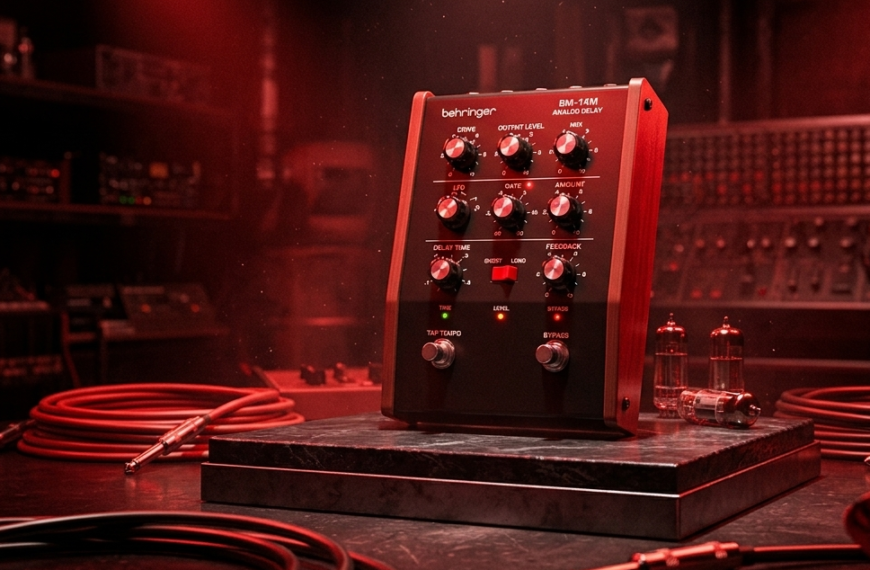
When I was testing with my basic Behringer UMC22 (yep, that $69 wonder),
I had to create a DIY mix-minus using software like Voicemeeter Banana.
It worked, but the setup took me a full weekend and made me question every life choice I’d made as a podcaster.
Beyond the interface, your microphone and headphones matter more than you think.
Use a dynamic mic like the Shure SM58 or Rode PodMic (both budget-friendly but sound pro).
Don’t use speakers—trust me,
your callers will hear themselves echoing, and it’s the fastest way to kill a conversation.
Closed-back headphones (like the Audio-Technica ATH-M40x) keep the audio tight and clean.
If you’re running a panel show or plan to take multiple callers, you’ll want a multi-input interface (like the Zoom PodTrak P8 or Tascam Mixcast 4) or even a hardware call screener, but that’s only if you’re going full FM-radio-style.
Most of us won’t need that complexity.
💻 B. Software & Services (This Is Where Most Podcasters Mess Up)
Here’s where things get spicy 🔥.
The VoIP tool you choose directly affects the caller experience and your audio quality.
I’ve tried Google Voice, Zoom, Skype, Cleanfeed, and even the podcast-specific platform Riverside.fm. Each one has quirks.
- Google Voice is free, super easy to use, and lets you get a number you can throw out on-air. But the call quality? Meh. Sometimes it sounds like the caller’s underwater in a washing machine.
- Zoom is familiar and flexible, but unless you tweak the settings (disable auto gain, turn on original sound), it aggressively processes audio, which can flatten your voice.
- Cleanfeed, though, is a gem. It’s built for podcasters and supports high-fidelity audio, stereo recording, and remote guests—all in the browser. Plus, the free plan covers 90% of use cases. I once recorded a full call-in episode with a guest from India, and it sounded like they were in the same room.
- Riverside.fm is premium, but it records locally on each side, meaning even if your internet stutters, the final audio is smooth. The downside? It’s a bit overkill if you’re only handling quick live calls. Also, their free plan is very limited.
If you’re routing audio, you’ll need virtual audio cables like VB-Audio Voicemeeter on Windows or Loopback on Mac.
These tools are intimidating at first (Loopback’s interface looks like a hacker’s dashboard 😅), but they let you control exactly where audio goes—mic to Zoom, Zoom to your DAW, DAW to stream, etc.
It’s essential for creating a mix-minus and keeping the show glitch-free.
If you’re planning to livestream, tools like OBS, StreamYard, or Restream can let you pull in video, screen-share calls, and even manage chat overlays.
But again,
don’t go this route unless your internet and computer can handle the load (I made that mistake during a livestream—my CPU said “no thanks” and froze mid-show).
☎️ C. Phone Call Integration Options (How to Let People Dial in From a Real Phone)
This is where it gets magical. If you want to let actual phone users call in, you’ve got three solid options:
- Google Voice gives you a free US-based number that works with most setups. It’s great for voicemails too.
- You can also connect a real phone via TRRS cable to your interface or mixer. I did this once with a cheap Android, and while it technically worked, the phone’s mic bleed and hum made me regret it. If you go this route, get a Bluetooth audio interface like the JK Audio BlueDriver-F3—it sounds cleaner and handles call audio better.
And here’s a stat worth knowing:
88% of podcast listeners say they feel more connected when they hear real voices from people like them (Edison Research, 2023). That’s the power of call-ins done right.
So, to recap: don’t overcomplicate your gear, but don’t cheap out either.
Use a solid interface, a trusted VoIP platform, and make sure your routing setup doesn’t create chaos mid-episode.
You’ll thank yourself when a listener calls in, asks a brilliant question, and it sounds like NPR rather than a ham radio club from 1994. 🎧
How to Set Up Your Call-In Show (Step-by-Step Guide)
So here’s where the magic happens—actually wiring up your call-in podcast setup without frying your brain.
I’ll break it down into two main setups—wired (if you’re using physical gear like an audio interface or mixer) and virtual (if you’re going software-only).
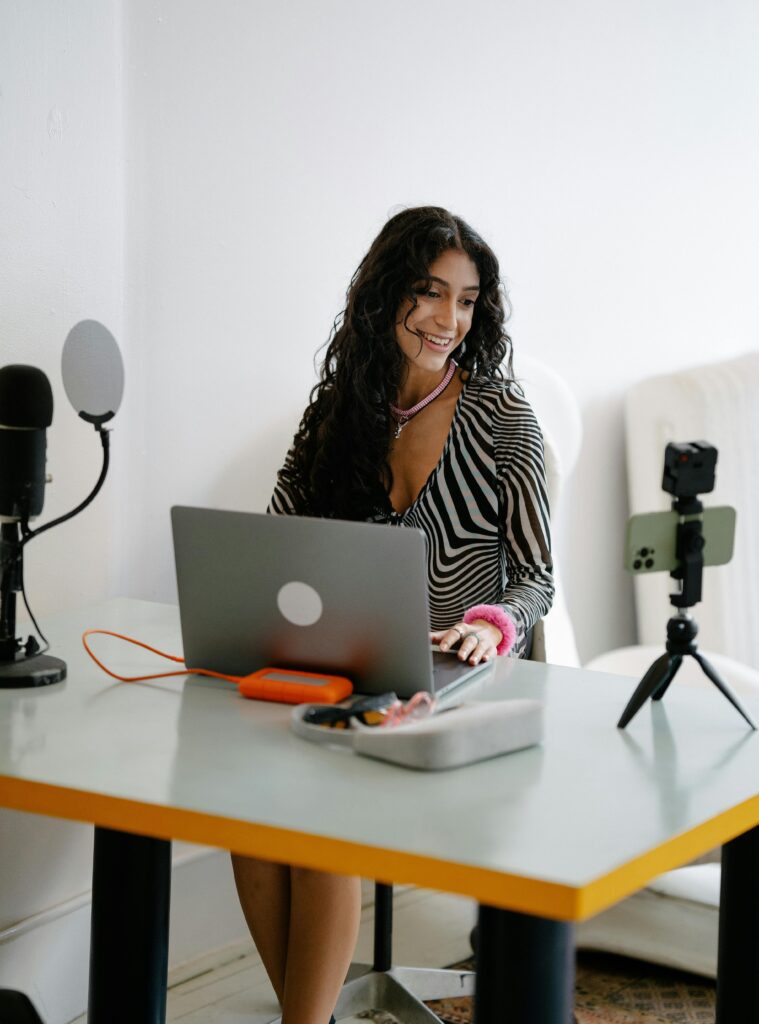
I’ve personally wrestled with both, and while I love the control of hardware, the software route saved me once when I had to run my entire podcast from a hotel room in Istanbul… with just my MacBook, a lav mic, and Loopback. 😅
🎛️ A. Wired Setup (Using Gear You Might Already Have)
If you’re working with an audio interface or mixer, this is your playground.
But the #1 thing you need is a “mix-minus” setup—a method that sends your caller everything except their own voice, so they don’t hear an echo (and leave you a bad review).
Surprisingly,
many people still skip this and wonder why their call-ins sound like a walkie-talkie from 1986.
Here’s the basic flow you’ll need:
Mic ➜ Audio Interface ➜ Computer
Caller (Phone/Zoom) ➜ Computer ➜ Interface ➜ Headphones (via mix-minus)
You can use a mixer with an aux send to create that mix-minus.
Or if you’re using a USB audio interface without aux routing (like the Focusrite Scarlett 2i2), you’re gonna hit a wall.
That’s what happened to me early on—I had a great mic and interface, but my caller kept hearing themselves back.
Total vibe-killer.
That’s when I switched to a Rodecaster Pro, which has mix-minus built-in and works seamlessly with Bluetooth or USB calls. Game-changer.
But it’s pricey, and if you’re not planning to run a multi-mic podcast, it might be overkill.
Want something cheaper?
I’ve also used the Behringer Q802USB, which gives you basic mix-minus with a little aux trickery—though the knobs feel plasticky, and you’ll definitely need to watch a YouTube guide the first time.
Just remember:
test everything using a dummy call before your actual show.
Nothing’s worse than realizing you’re recording 45 minutes of only your voice while your guest is just… gone.
🧠 B. Virtual Setup (No Gear? No Problem!)
Okay, now for the gearless warriors.
This is the setup I used for my first remote interview show during lockdown.
All I had was my MacBook Air, ATR2100 mic, and two apps: Zoom and Loopback.
And believe it or not, it sounded cleaner than some podcasts with $2,000 worth of gear. 🙃
Here’s what you’ll do:
- Install Loopback (Mac) or Voicemeeter Banana (Windows) – these let you route audio internally without physical cables.
- Create a virtual device that combines your mic and caller audio (Zoom/Google Voice).
- Use that device as your input in your DAW (like Audacity, Reaper, or Hindenburg).
- Turn off monitoring in the DAW to avoid weird echoes.
⚠️ Tip: Keep your caller on a separate audio track if possible. Editing becomes 10x easier when you want to remove “uhh” or cut out noisy backgrounds.
Tools like Riverside.fm or Cleanfeed offer multitrack remote recording, but beware—they rely heavily on the guest’s internet.
I had a caller drop 3 times mid-recording due to a flaky Wi-Fi.
That’s when I started asking all callers to plug into ethernet or at least sit next to the router.
If you’re a Windows user, Voicemeeter Banana is free, but expect a steep learning curve and occasional bugs (I once lost my input routing because of a Windows update 😩).
For Mac, Loopback is expensive ($99) but dead simple and reliable.
Worth it if podcasting is your serious side hustle or career.
🔴 C. Livestream Setup (Want to Go Live? Here’s the Extra Sauce)
Running your call-in show live?
First off—respect.
It’s thrilling and chaotic, but it’s where podcasting meets adrenaline.
To livestream, I usually open OBS (free and powerful) and bring in sources like:
- My mic (via Loopback)
- Zoom call window or browser for StreamYard
- Caller audio
- On-screen overlays for names, call-in number, etc.
You can stream to YouTube, Facebook, Twitch, or even all at once using Restream.io.
Here’s where you’ll need a call screener or a buffer zone.
One time, I went live without filtering the calls and got a “caller” who just played a goat scream into the mic.
Yup.
That clip now lives forever in my blooper reel.
To avoid that, I now use Google Forms to pre-screen, or ask callers to join a Discord stage where I can mute/unmute them.
Lastly, keep an eye on CPU usage and stream quality.
OBS can get choppy on older laptops. I use a dedicated iPad to monitor chat, adjust sound levels, and kick trolls if needed.
So whether you’re keeping it wired, going all-digital, or venturing into livestream chaos, setting up your call-in podcast show just takes the right mix of tools, testing, and patience.
According to Buzzsprout, 61% of podcast listeners prefer shows with listener interaction or Q&A segments (Buzzsprout, 2023).
So if you’re looking to boost engagement and make your audience feel like part of the show—this is your moment. Let’s make those phone lines ring. 📞✨
How to Screen and Manage Callers Like a Pro
Let’s be real—unfiltered call-ins can turn into absolute chaos if you don’t have some kind of caller screening system in place.
I learned this the hard way when I first experimented with a live Q&A episode.
No screener, no plan… just me, a Google Voice number, and a flood of prank calls, dead air, and one guy who spent 3 minutes pitching his crypto startup. 😩
That’s when I realized: screening isn’t optional—it’s survival.
So, what’s the best way to do it without building a radio station setup?
You’ve got a few practical options that scale depending on whether you’re solo or have a team (or just a helpful friend on Discord).
🧠 Simple Screening Techniques (No Extra Hardware Needed)
If you’re podcasting solo, try this quick workflow I use:
- Set up a Google Form with a short intake — name, question, and email.
- Share that form before your recording session and pick a few people in advance.
- Then, during the show, either call them back through Google Voice or DM them a Cleanfeed or Zoom link.
It’s shockingly effective for keeping things tight, especially if your show has a theme or you want more curated interaction.
What’s cool is you can add a question like “Have you called before?” to prioritize fresh voices.
But fair warning: it kills spontaneity a bit.
If your show thrives on “anyone-can-jump-in” chaos (like mine sometimes does on Fridays), then let’s talk about live screening.
💬 Live Screening with a Friend or Co-Host
This is my go-to method when I want a bit more control without killing the vibe.
If you’ve got a co-host, you’re already halfway there.
All you need to do is route calls through Google Voice or Zoom, and have your co-host answer the calls in a separate session (off-air), then push them to the main line when ready.
We use this script when screening callers:
“Hey! Thanks for calling in.
What’s your name and what would you like to talk about? We’re live in about 30 seconds—keep it clean and tight, cool?”
Honestly, that tiny buffer works wonders. It helps weed out trolls and gives your co-host a chance to gauge their audio quality.
Just last month, we had a caller trying to join from a construction site—💀 not happening.

⚠️ Avoiding Prank Calls and Chaos
Prank calls might seem funny until one slips a TOS-breaking word into your stream.
That’s when I started using a 5-second delay (most streaming tools like OBS and StreamYard support it).
Combine that with a quick mute shortcut (M key in OBS, or a Stream Deck if you’re fancy), and you’ve got a lifeline.
Also, don’t hesitate to set ground rules at the beginning of your episode. Just a quick heads-up like:
“We screen all calls and reserve the right to drop any that go off the rails.”
It’s respectful, sets expectations, and shows your listeners that you’re running a tight ship.
☎️ Bonus: Pre-Recorded Voicemail Segments
This is for the perfectionists like me who love the idea of call-ins but not the live mess.
I started offering a voicemail option through Google Voice—listeners call, leave a message, and I play it on the show.
What’s brilliant is I can edit for clarity, add background music, and even script a polished response.
One time, a listener from Norway left this beautiful 90-second story about how my podcast helped them through a breakup… but the audio was garbage.
Luckily, I just emailed them back, had them rerecord in a quiet room, and turned it into a touching segment. Zero stress. Max impact.
According to Podcast Host Academy, 65% of podcasters who include audience voices report higher retention—because when people hear themselves or their peers, they stick around longer (source).
🧰 My Favorite Tools for Caller Management
- Google Voice (free, flexible, and voicemail-ready)
- Cleanfeed Pro (lets you bring in guests and screeners with separate mix control—but pricey at $22/month)
- Discord Voice Channels (perfect if you already have a listener community—just make a “Green Room” voice channel)
- Zoom Waiting Rooms (basic but useful—screen people before admitting them live)
- Trello or Google Sheets (I use these to track who’s called before, what they talked about, and whether they’re worth bringing back)
At the end of the day, the magic of call-in shows isn’t just in the questions—it’s in how you handle the chaos with charm and structure.
I’ve made every mistake in the book, from muting myself for 10 minutes while a caller ranted to forgetting to hit record.
But with a simple screener system, some solid tools, and a few battle scars, your call-in episodes can become the most beloved part of your show.
Conclusion
Podcasting is a different game, and without a precise blueprint, the game will get tougher midway. Grow your podcast from scratch with Zero Audience and learn about how successful podcasters cracked the code by winning our Free Guide with step by step Guidelines.
Get your complete podcast equipment setup by visiting Podcast Equipment Bundle. Don’t let the side projects kill your time. Get in touch with podcasting services and experts those will save you tons of time at Podcast Production Services.
With that being said, Let’s connect with all such free and paid tool/services you might need knowingly or unknowingly to fuel your growth. Here’s 21 BEST AI TOOLS AND PLATFORMS TO GROW YOUR PODCAST AND CONTENTS. There are some bonus tools in the end too to make your day to day life easier.
There are some affiliate links on this page that will redirect you directly to the original products and services. Also by buying through those links you will be supporting us. So thank you ^.^
Related Posts
- Is it worth starting a podcast in 2025?
- How to do Podcasting with Iphone
- Maono Microphone Review
- Best Podcast Tables
- Can a Video Podcast Help SEO in 2025
- Why Podcasting Should Be a Core Part of Your Content Strategy?
- Case Study: How Tim Ferriss Uses Podcasting to Grow His Empire
- How Podcasters are Getting RICH: What You Need to Know in 2025
- Getting guests for your podcast: Full Guide in 2025
- 25 Reels Ideas based on the latest algorithm in 2025
- How to attract listeners to your podcast: Audio Insight
- Podbean vs Buzzsprout: Which Podcast Platform is Best for You in 2025?
- 24 Social Media Tips to get Viral
- How to Succeed on Youtube: Blueprint for 2025