Most people do not need a separate microphone preamp. Your audio interface already has one built in. 🎙️
A standalone preamp earns its place in three cases. Your mic is quiet, you need more inputs, or you want a feature or a sound your interface lacks.
Here is the number that explains the whole category! A Shure SM7B puts out 1.12 millivolts at the spec test level, and line level sits near 1.2 volts.
My arithmetic says that gap needs a multiplier of about 1,000, which is 60 dB of gain. That gap is why microphone preamps exist.
By the end of this guide you will know whether you need one, which job you are hiring it for, and which of six picks fits, from a $75 booster to a $700 single channel.
This guide draws on manufacturer spec pages, Sound On Sound, Home Studio Basics, and a named forum thread. I did not bench test any of this, so I name the source every time I share a number.
Affiliate links below. As an Amazon Associate I earn from qualifying purchases.
Quick Picks
These six picks cover every route. I pulled each gain figure from a manufacturer or retailer spec page.
| Pick | Type | Mic gain | Best for |
|---|---|---|---|
| Focusrite Scarlett 2i2 4th Gen | Audio interface | 69 dB | The preamp you may already own |
| Cloud Cloudlifter CL-1 | In-line booster | Up to +25 dB | Low-output dynamics and passive ribbons |
| Triton FetHead | In-line booster | 27 dB at a 3 kΩ load | The cheapest clean gain boost |
| dbx 286s | Channel strip | 0 to 60 dB | Voice work with compression and a gate in one box |
| Golden Age Project PRE-73 MKIII | Desktop preamp | 80 dB | Vintage-style sound on a budget |
| Focusrite ISA One | Desktop preamp | 0 to 60 dB | A premium single channel with a DI |
My take is simple. Start with pick 1, then move down the list only when a specific problem sends you there.
Pick Your Route in Ten Seconds
- Quiet mic and a hissy recording. Try an in-line booster, pick 2 or pick 3.
- More mics than inputs. Add inputs with a preamp expander, covered below.
- Voice work that needs polish. The dbx 286s, pick 4, packs the processing into one box.
- A vintage-style sound. The PRE-73 MKIII, pick 5, has the gain and the switches.
- A premium single channel. The ISA One, pick 6, adds a DI and four impedance settings.
- None of the above. Keep your interface. It is fine!
The Short Version
- Most creators. Your interface preamp is enough, and Sound On Sound says the same.
- Low-output mics. An in-line booster costs about $75 to $129 and adds 25 to 27 dB.
- More inputs. This is the only case Sound On Sound calls cut and dried.
- Sound and features. A desktop preamp or channel strip runs $339 to $700.
What Does a Microphone Preamp Actually Do?
A microphone preamp lifts a tiny mic signal up to line level so your interface, mixer, or recorder can use it.
Home Studio Basics puts mic output at about 0.005 to 0.05 volts and line level at about 1.2 volts RMS. That is a jump of roughly 24 to 240 times by my arithmetic.
The same article notes that 60 dB of gain multiplies the signal by 1,000. Now run the SM7B through that math.
Shure lists the SM7B at -59.0 dBV/Pa, which is 1.12 mV, on a Full Compass spec listing. Multiply 1.12 mV by 1,000 and you land at about 1.12 V.
So 60 dB gets an SM7B at the test level to roughly line level. That also explains why one forum poster says the SM7B “typically requires 60db of clean gain.”
Gain is only the first job! A preamp also handles three other things.
- Phantom power. Condenser mics need 48 volts, and our phantom power guide explains how it works.
- Input impedance. It sets the load the mic sees, and Royer asks for at least five times the mic’s own impedance on its ribbons, which our Royer R-121 preamp guide covers.
- Character. Home Studio Basics says an external preamp can “change and alter the sound.”
Do You Need a Separate Microphone Preamp?
Probably not. Sound On Sound’s “Do I need a mic preamp?” answer breaks the question into three reasons.
Only the first one is clear cut.
- You need more inputs. If you have more mics than preamps, you need more preamps. Sound On Sound points to S/PDIF or ADAT expanders as the way to add them.
- You need more level. The article calls this technically unnecessary, because the interface input has a dynamic range of at least 100 dB while speech has a signal to noise ratio of maybe 40 dB.
- You want a different sound. Inside its comfort zone, a preamp “it’ll sound pretty much identical to any other mic preamp,” so character comes from pushing one hard.
That last point comes with a catch. If you buy a preamp for its sound, it needs an output level control, and Sound On Sound warns that not every outboard unit has one.
Now the gain argument gets interesting 🤔. Real users disagree with the “technically unnecessary” line in practice.
In a Seymour Duncan forum thread, user GreatOz argued that a Behringer UMC202HD’s self-noise (about -129 dBu) is close to a FetHead’s (about -130 dBu). User dystrust disagreed and said the problem is total gain, not self-noise.
Another poster, B2D, said he uses a Scarlett 2i2 with a Cloudlifter CL-1 and “wouldn’t run the mic without it.” Those are their reports, and I did not verify them.
My read of both sides is that the booster helps when your interface runs near the top of its gain dial. Home Studio Basics backs that up, saying interface preamps sound fine at about 35 to 50 dB but degrade at extreme settings.
Is Your Audio Interface Already a Good Microphone Preamp?
Yes, in most cases. Home Studio Basics says built-in interface preamps are “clean and clear” and fine for most home setups.
Apogee tells SM7B owners that most preamps offer “at minimum 45dB of gain” while its smallest models “start around 62dB.” Apogee adds that its preamps stay clean at maximum, so a Cloudlifter is a personal choice.
| Source | What it says about interface gain |
|---|---|
| Apogee | Most preamps offer at least 45 dB, and Apogee’s smallest models start around 62 dB |
| Home Studio Basics | Interfaces rarely provide more than 60 dB, while ribbons typically need around 70 dB or more |
| Focusrite Scarlett 2i2 4th Gen | 69 dB of gain and -127 dBu equivalent input noise, per Focusrite’s published specs |
| SSL 2 MKII | 64 dB of gain and -130.5 dBu equivalent input noise, per SSL’s published specs |
Our Scarlett 2i2 vs SSL 2 comparison walks through both of those spec sets in full.
Beginners should skip the external preamp. Home Studio Basics recommends starting with an interface like the Scarlett 2i2 or the Volt 2 and adding a standalone unit later.
A Two Minute Test Before You Buy
Run this before you spend a dollar!
- Speak at your normal distance and raise the gain until your average level sits around -18 dBFS. Home Studio Basics gives that as the target for vocals, with peaks well below -10 dBFS.
- Check where the gain knob ended up. If it sits near the end of its travel, you are using the worst part of the preamp.
- Listen with headphones during a pause in your speech. If you hear hiss, a booster is the cheapest fix to try first.
If the knob sits comfortably mid-range and the pause is quiet, you do not need to buy anything.
Which Microphones Need Extra Gain?
Low-output dynamics and passive ribbons top the list. Condensers rarely send anyone shopping for a booster.
| Mic type | What the sources say |
|---|---|
| Shure SM7B | -59.0 dBV/Pa (1.12 mV) at 150 Ω per Shure’s spec. A forum poster says it typically needs 60 dB of clean gain, while Apogee says its own preamps handle it alone. |
| Passive ribbons like the Royer R-121 | Royer asks for 60 to 70 dB of clean gain. Home Studio Basics says ribbons typically need around 70 dB or more. |
| Other dynamics like the SM57 and Sennheiser MD441 | Triton names both as mics that benefit from the FetHead. Cloud lists the SM57 and SM58 as suitable for the Cloudlifter. |
| Condensers | Home Studio Basics says external preamps have less impact on condensers. |
Shure also built its own answer. The new SM7dB adds a built-in preamp with +18 or +28 dB of gain and starts at $499, according to audioXpress.
That tells you how real the gain gap is. A mic maker put a preamp inside the mic 🔊.
What Types of Microphone Preamps Exist?
Six types cover almost everything you will see in a store. Each one solves a different problem.
| Type | How it works | Example |
|---|---|---|
| Audio interface | Preamps are built in, so you add no extra gear | Focusrite Scarlett 2i2 |
| In-line booster | Sits between the mic and the interface and runs on phantom power | Cloudlifter CL-1, FetHead |
| Desktop single channel | A standalone box that feeds a line input on your interface | PRE-73 MKIII, ISA One |
| Channel strip | A preamp plus processing like a compressor and a gate | dbx 286s |
| Preamp expander | Adds more mic inputs through ADAT or S/PDIF | Sound On Sound names the method |
| Mic with a built-in preamp | The booster lives inside the microphone | Shure SM7dB |
Home Studio Basics says standalone preamps often use better components, and their power supply is not shared with other parts. That helps most at high gain.
What Are the Best Microphone Preamps?
I picked one product for each job instead of ranking six clones. Every spec below comes from the maker or a retailer listing, and prices shift, so use the button for today’s number.
I left out the generic electret amps that rank on Amazon, because their listings describe 3.5 mm inputs and not XLR studio mics.
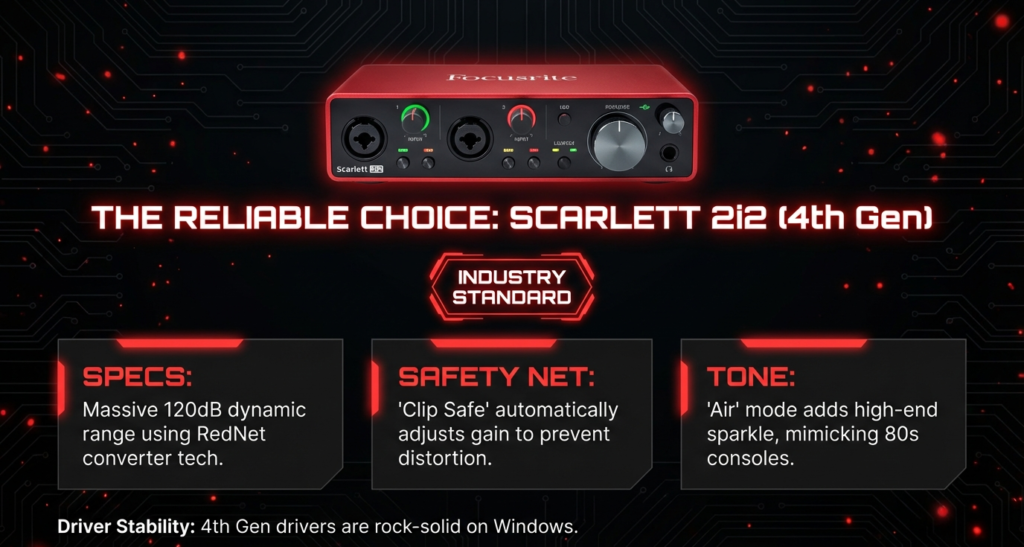
1. Focusrite Scarlett 2i2 4th Gen
This is the microphone preamp most readers already own or will buy first. It offers 69 dB of gain, -127 dBu of equivalent input noise, and +16 dBu of maximum input, per Focusrite’s published specs.
Auto Gain and Clip Safe set and protect your level for you, which helps beginners avoid clipping. The 2i2 also has Air modes for a brighter tone.
It clears the 60 to 70 dB range that Royer asks for on ribbons, which our Royer R-121 preamp guide explains. Our full Scarlett 2i2 review covers the rest.
Skip it if you need more than two inputs or a built-in high pass filter. The SSL 2 has a 75 Hz filter on each channel and lower noise at -130.5 dBu.
2. Cloud Cloudlifter CL-1
The Cloudlifter is the booster everyone talks about. Cloud’s page lists up to +25 dB of gain, a 3k input impedance, and a price of $129.
It runs on your interface’s +48V phantom power but does not pass that voltage to the mic. Cloud says that protects ribbon and tube mics.
That design has one catch. Cloud states that a condenser mic needing phantom power requires a separate supply, so the CL-1 suits dynamics and ribbons, not condensers.
Cloud gives no noise figure on its page, only claims about improved signal to noise. So treat the quiet-recording promise as marketing until you hear it on your own mic.
Forum users report real gains. One poster in the Seymour Duncan thread says Cloudlifter and FetHead units add about 20 dB and that is enough “with pretty much any preamp,” a lower number than Cloud’s 25 dB claim.

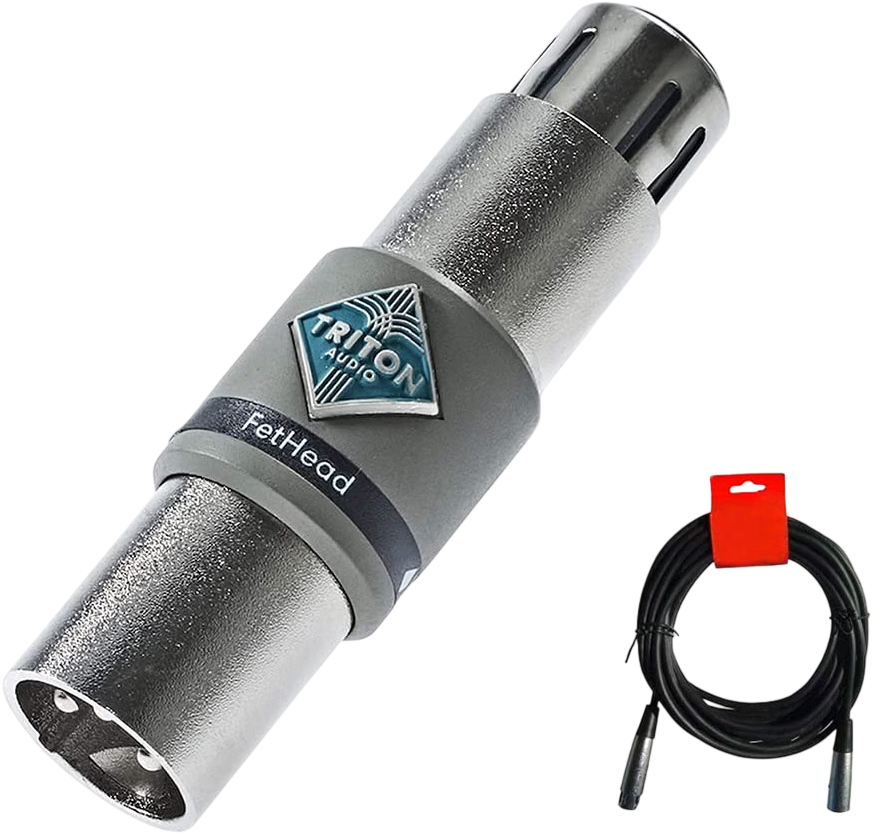
3. Triton FetHead
The FetHead does the same job for less money! A retailer page lists 27 dB of amplification at a 3 kΩ load and a 22 kΩ input impedance, at about $75.
It needs 24 to 48V phantom power for its own circuit. The page says some ribbon mics do not tolerate phantom power, and the FetHead shields the mic from it.
Triton names the Shure SM57, the Sennheiser MD441, and the Shure SM7 as mics that benefit. Do not confuse it with the FetHead Phantom, a separate product sold for condenser mics.
Triton publishes no noise figure either. In the same forum thread, GreatOz put the FetHead near -130 dBu, which is his estimate and not a Triton number.
Cloudlifter vs FetHead at a Glance
| Spec | Cloudlifter CL-1 | Triton FetHead |
|---|---|---|
| Gain | Up to +25 dB | 27 dB at a 3 kΩ load |
| Input impedance | 3k | 22 kΩ |
| Phantom power | Uses +48V, does not pass it to the mic | Needs 24 to 48V, shields the mic from it |
| Price | $129 from Cloud | About $75 |
| Published noise figure | None on the page | None on the page |
| Mics the maker names | SM7B, SM57, SM58, RE20, Royer R10, Cloud 44 | SM57, MD441, SM7 |
The FetHead costs about $54 less. Triton states its 27 dB at a 3 kΩ load while Cloud’s page names no load, so the two gain numbers are not a clean head-to-head.
My take is to try the cheaper FetHead first on a dynamic mic. Ribbon owners should check their mic’s manual either way, because Triton warns that some ribbons do not tolerate phantom power while Cloud lists the Royer R10 as suitable.
4. dbx 286s
The 286s fits voice work best. It combines a 0 to 60 dB mic preamp with a compressor, de-esser, expander and gate, and a low frequency filter, at $339 on a BSW listing.
Specs from that listing include a mic input impedance near 4.2 kΩ, -125 dBu of equivalent input noise, and +48V phantom power. The compressor threshold runs from -40 dBu to +20 dBu.
It also has an insert and balanced outputs on 1/4 inch TRS jacks, with an output gain control from -30 dB to +10 dB. That output control matters, since Sound On Sound says not every outboard preamp has one.
My read is that the 60 dB ceiling matches the SM7B math from earlier, so it reaches line level with no spare room. If you record after the processing, you commit to those settings.

5. Golden Age Project PRE-73 MKIII
This is the budget pick for a vintage-style sound. Sweetwater lists 80 dB of gain, switchable 1200 and 300 ohm mic impedance, and a price of $349.
Controls include a gain knob with a mic and line switch, an output level control, phantom power, absolute phase, a high pass filter, and a two-position high frequency boost. A DI input handles guitars and bass.
Sweetwater says the 80 dB “easily handles passive ribbon mics on quiet sound sources.” Podcastage’s video description calls it a budget Neve 1073 style preamp.
Know this first. The Sweetwater page publishes no noise figure, so I cannot tell you how it compares on hiss at high gain.

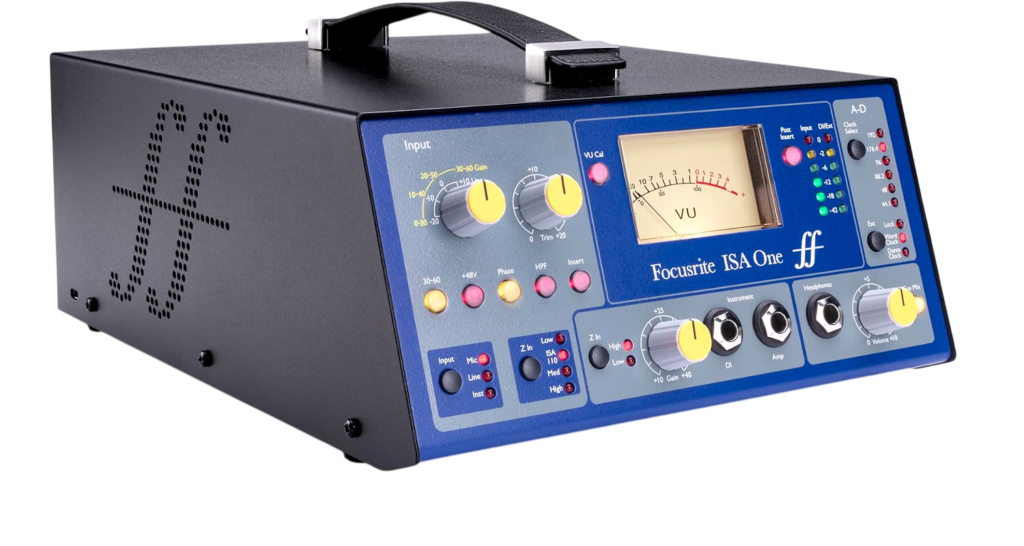
6. Focusrite ISA One
The ISA One is the premium single channel. Focusrite lists 0 to 60 dB of gain in 10 dB steps with a 20 dB variable trim, -126 dB equivalent input noise at 60 dB of gain, and a price of $699.99.
An independent DI has its own gain from 10 to 40 dB. A Z In button steps through four mic impedances, including the original ISA110 setting.
Sound On Sound’s Paul White called it “an excellent preamp, both on paper and subjectively.” He described the default sound as natural but flattering, good at pushing a vocal forward without sounding bright.
That review dates to October 2008, so read it as a verdict on the design and not on today’s price. White’s one complaint was no way to monitor the preamp inputs and the cue mix together.
How Do You Connect an External Microphone Preamp?
Connect it to a line input, not a mic input. Home Studio Basics warns that using the interface’s front mic input gives a weaker signal and more noise.
With a Desktop Preamp or Channel Strip
- Plug the mic into the preamp’s mic input with an XLR cable.
- Run the preamp’s output to a line input on your interface, using the back-panel connection to bypass the interface preamps.
- Turn the interface’s gain down, then set your level with the gain on the external preamp.
- Aim for an average near -18 dBFS in your recording software, with peaks well below -10 dBFS.
With a Cloudlifter or FetHead
- Plug the booster into your interface’s mic input, then plug the mic into the booster.
- Switch on +48V phantom power on that input, since both boosters use it to run.
- Start with the interface gain low and raise it slowly, because the booster already added 25 to 27 dB.
Want to see how it works on screen? This lesson is titled “Microphone Preamps Explained in Depth” 🎥. I confirmed the title and link, not the content, so check the first minute before you rely on it.
What Specs Matter When You Compare Microphone Preamps?
- Maximum gain. Match it to your mic, using the 60 dB SM7B math from earlier as a guide.
- Equivalent input noise. Home Studio Basics warns that a -128 dBu claim only holds if the noise stays constant at all gain settings.
- Maximum input level. It decides how much headroom you have, and the next table shows why.
- Input impedance. Ribbons care most, and switchable options like the PRE-73’s 300 and 1200 ohms give you room.
- Output level control. You need it if you push the preamp for character.
- Extras. A pad, low cut, phase switch, and analog insert are things interface preamps often lack, per Home Studio Basics.
Why Maximum Gain Alone Misleads You
Sound On Sound’s method is to subtract the gain range from the maximum input level. The result is the quietest signal that can reach full scale.
Their example compares a 50 dB preamp with +10 dBu maximum input against a 60 dB preamp with +24 dBu. That gives -40 dBu against -36 dBu, so the bigger gain number is the weaker choice for quiet sources.
I ran the same method on the two interfaces from earlier, using the numbers in our comparison post.
| Interface | Max input | Gain | Quietest full scale signal |
|---|---|---|---|
| Focusrite Scarlett 2i2 4th Gen | +16 dBu | 69 dB | -53 dBu |
| SSL 2 MKII | +9.7 dBu | 64 dB | -54.3 dBu |
The SSL 2 has 5 dB less gain yet reaches full scale with a signal about 1.3 dB quieter. That is my arithmetic from published numbers, and it shows why you compare headroom and gain together!
What Mistakes Hurt Microphone Preamp Setups the Most?
- Plugging into the wrong input. Using the interface’s front mic input gives a weaker signal and more noise, per Home Studio Basics.
- Stacking two high gains. Turn the interface gain down when you use an external preamp, then set level on the external unit.
- Using a Cloudlifter on a condenser. Cloud says phantom-powered condensers need a separate supply, since the CL-1 does not pass phantom through.
- Fixing hiss in the DAW. One forum poster warns that boosting the level afterward also boosts any noise in the track.
- Shopping on gain alone. Use the headroom math above before you spend $349 or $700.
- Buying a preamp before fixing the room. Sound On Sound says an outboard preamp only makes a difference once the mic, placement, and room are already right.
Did You Know 🤯
Sound On Sound notes that speech has a signal to noise ratio of maybe 40 dB, while an audio interface input has a dynamic range of at least 100 dB, which is why the site calls low recording level a nuisance and not a technical problem.
Which Microphone Preamp Should You Buy?
Keep your interface if
- Your gain knob sits comfortably mid-range
- Your pauses are quiet in headphones
- You use a condenser or a higher-output dynamic
Buy a Cloudlifter or FetHead if
- You run an SM7B or a passive ribbon near the top of your gain dial
- You hear hiss during pauses
- You want the cheapest fix, about $75 for the FetHead or $129 for the Cloudlifter
Buy a desktop preamp or channel strip if
- You want voice processing before the converters, so pick the dbx 286s
- You want 80 dB of gain and switchable impedance on a budget, so pick the PRE-73 MKIII
- You want a premium single channel with a DI, so pick the ISA One
Want a crowd’s picks too? This long r/audioengineering thread asks engineers for the best microphone preamp they would use. I linked it by its title and did not summarize the answers.
Microphone Preamp FAQ
What is the purpose of a microphone preamp?
It boosts a tiny mic signal to line level.
Mic output sits around 0.005 to 0.05 volts, while line level is about 1.2 volts, per Home Studio Basics.
Is an audio interface a mic preamp?
Yes, it includes one.
Interface preamps are clean and fine for most home setups, according to Home Studio Basics.
What is an XLR preamp?
It is a preamp that takes an XLR mic cable.
That covers desktop boxes and in-line boosters like the Cloudlifter and FetHead, which sit between the mic and the interface.
What is a good mic preamp for vocals?
It depends on your mic and your budget.
The dbx 286s adds voice processing, and Sound On Sound said the ISA One pushes a vocal forward without sounding bright.
Do I need a preamp for the Shure SM7B?
Not always.
Apogee says its preamps handle the SM7B alone, while a forum poster says it typically needs 60 dB of clean gain.
Does a microphone preamp make a difference?
Less than most people expect.
Sound On Sound says a preamp in its comfort zone sounds pretty much like any other.
Do Cloudlifters and FetHeads need phantom power?
Yes.
Both run on phantom power but shield the mic from it, per Cloud and Triton’s pages.
So decide if you need gain, inputs, or sound first, then pick your gear 🎶
As an Amazon Associate I earn from qualifying purchases. There are some affiliate links on this page that will redirect you directly to the original products and services. Also by buying through those links you will be supporting us. So thank you ^.^
Related Posts
Here is a list of posts you can read next.
- Royer R-121 Preamp Guide
- What Is Phantom Power?
- Focusrite Scarlett 2i2 Review
- SSL 2 Audio Interface Review
- Focusrite Scarlett 2i2 vs SSL 2
- Best 2 Channel Audio Interface
- Audio Interface vs Mixer for Recording
- Universal Audio Volt 276 Review
- Best Audio Interface for Streaming
- How to Connect an Audio Interface to a Computer