In podcasting and content creation, audio quality is important. Just like a rock concert requires a sound check to deliver a some performance, podcasters too must conduct their own version of a mic check. In this guide, we talk about the importance of sound checks, understanding decibel levels, sound mastering, how to avoid dreaded distortion in your podcast recordings and many more
The Importance of Sound Checks
Suppose, you’re all set to record your latest episode, your guest is ready to go, and you hit record. But wait, is the microphone even picking up sound?
Are the levels too low or too high? Without a proper sound check, you risk recording an entire episode only to realize later that the audio quality aint hat you wanted.
Just as rock ‘n’ rollers perform mic checks to ensure a flawless performance, podcasters must conduct their own pre-recording checks to guarantee optimal sound quality.
Understanding dB Levels
Decibels (dB) are the unit of measurement used to express the intensity of sound.
From the faintest whisper to a thunderous cry, dB levels indicate the power of the audio signal.
In the context of podcasting,
You have to know how to interpret dB levels is essential for maintaining clear, distortion-free sound.
Too low of a signal level results in barely audible audio, while too high of a signal level leads to distortion which makes it unpleasant for listeners.

Visualizing dB Levels
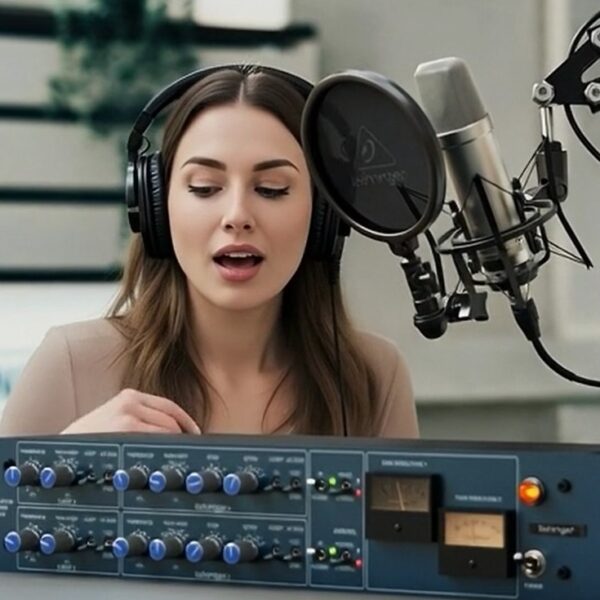
In the early days of audio equipment, dB levels were often displayed using analog VU meters—a needle bouncing in response to the audio signal.
As technology advanced, these meters were replaced by LED indicators that change color based on the signal strength.
Understanding what these colors signify is crucial for podcasters:
- Green: Indicates a low signal level, meaning the audio is too quiet and may require amplification.
- Yellow-Orange: Signifies an optimal signal level, where the audio is loud and clear without distortion.
- Red: Indicates a dangerously high signal level, nearing the point of distortion (clipping).
- Red with double bars: Warns of severe distortion, where the audio will sound unpleasant and distorted to listeners.
Conducting Your Sound Check
Now t’s time to put this knowledge into practice.
Before hitting record, I
want you to take a few moments to perform a thorough sound check:
- Check your microphone: Ensure your microphone is properly connected and functioning. Tap on it lightly to confirm that sound is being picked up.
- Monitor dB levels: Use the dB meter on your recording software to monitor the signal strength. Aim for the sweet spot in the yellow-orange range for optimal audio quality.
- Adjust levels if necessary: If the levels are too low, adjust the microphone gain or input volume. Conversely, if the levels are too high, lower the gain to prevent distortion.
- Test recording: Record a brief test segment to listen back and ensure the audio sounds clear and balanced. Make any adjustments as needed before proceeding with the main recording.
Avoiding Distortion
Distortion is the bane of every podcaster’s existence—it detracts from the listening experience and can turn off your audience. To avoid distortion:
- Keep an eye on dB levels: Continuously monitor the signal strength during recording to prevent levels from entering the red zone.
- Maintain proper distance from the microphone: Position yourself and your guests at an appropriate distance from the microphone to avoid overloading the input and causing distortion.
- Use a pop filter: Invest in a pop filter to reduce plosive sounds and prevent clipping, especially when recording vocals up close.
Keeping Your Voice Just Right!
Let’s say you are recording something, like a podcast or a song, and you want to make sure it sounds just right.
There’s something called a “volume meter” that shows how loud your voice or music is.
It looks different depending on what program or device you’re using, but they all do the same thing: help you make sure your sound is clear and not too loud.
The goal is to keep your sound levels in a good range.
You want them to be high enough to hear well, but not so high that they make the meter go into the red zone.
When the meter is mostly in the green or low red area, it means your voice or music is at a good volume.
You might get a bit louder sometimes, which is okay, but you don’t want to stay in the red too much.
Before you start recording, it’s smart to check how loud your voice sounds on your equipment.
If it’s too quiet, people will have to turn up their volume really high to hear you, and that’s not good.
But if it’s too loud, it can be uncomfortable for listeners, like if suddenly a loud noise comes from their headphones.
If your recording is too loud, it can cause problems, like distortion or crackling sounds. This happens when you give too much sound to your equipment, kind of like when you turn up the volume on a speaker too high.
To avoid these problems, it’s important to find the right balance in your sound levels.
Instead of spending a lot of time adjusting the levels over and over again, it’s better to practice and get comfortable speaking or singing at the right volume.
It’s like getting used to talking into a microphone until it feels natural.
So, in short, when you’re recording something, you want to keep an eye on the volume meter, make sure your sound levels are good, and avoid being too loud or too quiet. Practice makes perfect!
Setting your levels
Your mission, should you decide to accept it, is to keep your levels in the neighborhood of 0 dB, dipping and spiking when necessary.
For podcasting, consistency is key.
You have your mixer turned on (if you have one), your mic is plugged in and turned on — check — and your software is running.
Now follow these steps to check levels:
- Firstly, make sure you’re speaking directly into the microphone, pointing your voice directly at the recording device. This helps the microphone pick up your voice better and reduces unwanted sounds like popping. If you notice any popping sounds, consider investing in a windscreen or pop filter to fix that.
- While you’re talking, keep an eye on the dB levels on your computer screen. If the levels are spiking into the red or staying in the green, adjust your input volume settings on your mixing board or audio-editing software. It might take a bit of multitasking, but continue adjusting the input levels while talking and monitoring the input meters.
- Once you’ve made adjustments, re-record your voice at the new settings. Try to maintain the same manner and inflection as you did in the initial recording.
- When reviewing the second take, keep an eye on the dB input levels and make further adjustments if needed. It’s better to err on the side of caution and record at a slightly lower volume. You can always increase the volume later during post-production.
To increase the volume later using Audacity, select your audio and use the Effects ➪ Amplify feature. Alternatively, you can save your audio to WAV format and use a tool like The Levelator to fix the levels.
Keep this in Mind
Finally, after setting your levels, I want you to make a note of the settings somewhere other than your computer, like a PDA or a good old legal pad and pen.
This ensures you have a reference in case your preferences are lost or accidentally changed.
And yes,
even adults enjoy playing with super-cool-looking equipment, so let’s keep our settings safe from any unexpected adventures in the studio!
And that’s it!
With these steps, you’ll ensure consistent and optimal audio levels for your podcast recordings.

Conclusion
In conclusion, ensuring optimal audio levels for your podcast recordings is essential for maintaining consistency and quality. By following the steps outlined above, including speaking directly into the microphone, monitoring dB levels, adjusting input volume settings, and making notes of your settings, I can guarantee that you can achieve clear and balanced audio. Remember, it’s better to err on the side of caution and record at a slightly lower volume, as you can always adjust the levels during post-production. With attention to detail and a commitment to quality, your podcast will sound professional and engaging, capturing the attention of your audience episode after episode. So, keep those levels in check, and happy podcasting!
Into Podcasting? Podcasting is a different game, and without a precise blueprint, the game will get tougher midway. Grow your podcast from scratch with Zero Audience and learn about how successful podcasters cracked the code by winning our Free Guide with step by step Guidelines.
Get your complete podcast equipment setup by visiting Podcast Equipment Bundle. Get in touch with podcasting services and experts those will save you tons of time at Podcast Production Services.
With that being said, Let’s connect with all such free and paid tool/services you might need knowingly or unknowingly to fuel your growth. Here’s 21 BEST AI TOOLS AND PLATFORMS TO GROW YOUR PODCAST AND CONTENTS. There are some bonus tools in the end too to make your day to day life easier.
There are some affiliate links on this page that will redirect you directly to the original products and services. Also by buying through those links you will be supporting us. So thank you ^.^


