Ever hit record on your mic, only to play it back and hear a mess of background noise—buzzing fans, traffic, or even your neighbor’s dog having an existential crisis? 🎙️ It’s frustrating, right? I’ve been there too. I once recorded a podcast episode that I thought was gold, only to find my laptop fan whirring like a jet engine in the background. No amount of post-processing could save it. Clean audio is everything—If you’re a YouTuber, podcaster, streamer, musician, or remote worker, bad sound quality kills credibility faster than a lagging video. That’s why you need to know How to Remove Background Noise From Mic
Why Does This Matter?
Studies show that bad audio is more irritating than bad video—Viewers are three times more likely to stop watching a video with poor audio, even if the visuals are great (TechSmith, 2023).
And if you think software will magically fix everything, think again—even AI tools like Krisp and RTX Voice sometimes over-filter, making voices sound unnatural.
Prevention is always better than correction.
What You’ll Learn
This step-by-step guide will show you exactly how to remove background noise from your mic—before recording, in real time (for calls & streaming), and after recording (post-processing). You’ll learn:
- How to soundproof your space without spending a fortune
- Which microphones actually reject noise (Spoiler: Condenser mics aren’t always the best)
- The best free & paid software for real-time noise reduction
- ✔How to use AI tools without destroying your voice quality
How to Reduce Background Noise Before Recording? (Best Practices)
If you’ve ever hit the record button, played back your audio, and heard the annoying hum of a ceiling fan or distant chatter, you know how frustrating background noise can be.
The good news?
Fixing it before you even start recording is way easier than trying to remove it later.
Trust me, I’ve been there—spending hours in Audacity trying to clean up what should’ve been a simple voiceover. Let’s make sure you don’t have to go through that.
A. Optimize Your Recording Environment
🎯 Find the Quietest Spot (Your Mic Can’t Do Everything)
A high-end mic won’t fix a bad environment.
I once tried recording in my living room—bad idea. My mic picked up everything: the AC, my laptop fan, even my neighbor’s TV through the walls.
Rule #1: Always pick the quietest room.
If you don’t have a dedicated studio, get creative:
- Use a closet – Clothes absorb sound like magic. Many pro voice actors do this!
- Pick a carpeted room – Hard floors reflect sound, making noise worse.
- Close windows & doors – Seems obvious, but you’d be surprised how much outside noise creeps in.
🔇 Soundproofing Hacks (Budget & Pro Solutions)
Let’s be real—acoustic foam panels are great, but not everyone wants to spend $50+ on them. Instead:
- Cheap Fix: Hang thick blankets or curtains on walls.
- Even Cheaper: Stack pillows around your mic (I did this before upgrading—works surprisingly well).
- Best Fix: If you’re serious, invest in bass traps and acoustic panels. They don’t just stop noise, they also reduce echo.
According to a BBC study on home recording acoustics, soft surfaces can reduce room noise by up to 40%.
So, before you buy expensive plugins to fix noise, try fixing your space first.
🎤 Mic Placement – 90% of People Get This Wrong!
Your mic’s position can make or break your audio quality. Ever wondered why your mic picks up every little noise except your voice?
You’re probably too far away.
- Keep it 6-12 inches from your mouth – Too far? More room noise. Too close? Pops and distortion.
- Use a boom arm – Keeps the mic stable and at the right height.
- Point the mic away from noise sources – If your PC fan is loud, face the mic in the opposite direction.
A simple fix like this can cut background noise by 30-50%—no software needed.
B. Choose the Right Microphone & Settings
🎙️ Not All Mics Are Made Equal – Get a Directional Mic
Ever wondered why cheap USB mics like the Blue Snowball pick up everything, while pro mics don’t?
It’s all about pickup patterns.
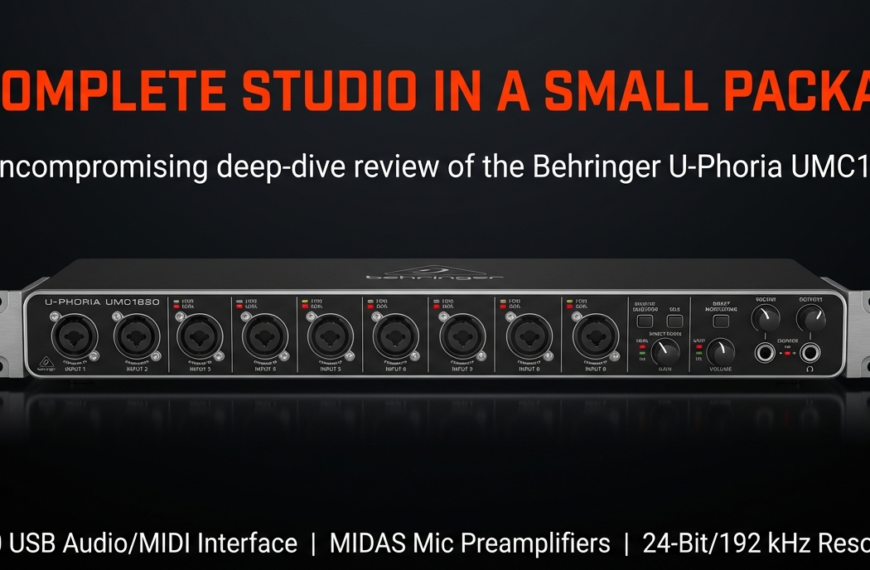
- Best for Noise Reduction? Dynamic mics (like the Shure SM7B). They reject background noise like a boss. Downside? They need more gain.
- Worst Choice? Omnidirectional mics (like those on webcams). They pick up everything.
If you’re using a condenser mic (like an AT2020), expect more sensitivity to noise.
Great for studio vocals, not so great for untreated rooms.
🎛️ Mic Gain & Sensitivity – Stop Cranking It Up!
One of the biggest mistakes? Turning up mic gain too high. The higher the gain, the more noise gets amplified. Instead:
- Lower the gain & bring the mic closer.
- Use a pop filter – It blocks air bursts from speech, which can distort sound.
- Enable ‘Low Cut’ if available – Many mics have a built-in low-frequency filter to remove hums from AC units or vibrations.
A study by Neumann Audio found that improper gain settings are responsible for over 60% of unwanted mic noise. So, tweaking this one setting can make a huge difference.
C. Use Hardware Noise Reduction (If You Want Pro-Level Audio)
🔌 Audio Interfaces with Noise Reduction Features
An audio interface isn’t just for musicians.
A good one, like the Focusrite Scarlett 2i2, gives you better preamps, which means less electronic noise.
But if you really want clean audio:
- Get an inline preamp (like Cloudlifter CL-1). It boosts your signal without increasing noise.
- Use an interface with built-in DSP noise suppression (like Rode RODECaster Pro).
🎚️ Hardware Noise Filters – Worth It?
If you’re dealing with constant noise (AC hums, computer fans), a hardware noise gate like the DBX 286s can cut noise before it even reaches your recording software.
The downside?
It’s not cheap (~$200), but if you’re doing professional podcasting or voiceovers, it’s a game-changer.
Prevention > Fixing Later
I used to waste hours cleaning up audio, until I realized that good mic technique and a quiet space do 90% of the work.
The best noise reduction is the one you never have to do in post.
So before you record, take a few minutes to optimize your space, adjust your mic settings, and use the right gear.
Trust me—your future self will thank you! 😊
How to Remove Background Noise in Live Calls, Streaming, & Podcasts
There’s nothing worse than being in a live Zoom call, podcast, or stream, only to have someone say,
“Hey, your mic is picking up a lot of background noise.”
I’ve been there—frustrated because my expensive mic was somehow still letting in my neighbor’s barking dog. 😤
But after testing multiple software and hardware solutions, I found the best ways to remove background noise in real time without wrecking my voice quality.
A. Software-Based Noise Cancellation
If you’re streaming, podcasting, or just in a meeting, the easiest way to fix background noise is software noise suppression.
Many tools now use AI-based noise reduction to filter out unwanted sounds, but not all of them work flawlessly.
- Windows & Mac Built-in Noise Suppression
- Windows users: Go to Sound Settings → Select your mic → Click Device Properties → Enable Noise Suppression. It’s basic but better than nothing.
- Mac users: In System Preferences, go to Sound and enable Ambient Noise Reduction. But be warned—it can make voices sound muffled because it aggressively cuts background sounds.
- Krisp AI – Best for Calls & Online Meetings
I once joined a Zoom call from a coffee shop, completely forgetting that my mechanical keyboard was loud as a jet engine. 😅 But Krisp AI, an AI-powered noise cancellation app, completely removed the typing noise. It works with Zoom, Google Meet, Discord, and even OBS for streaming.- What’s great: It doesn’t just suppress noise—it completely removes it while keeping voice clarity intact.
- The downside? The free plan only gives you 60 minutes per day of noise cancellation.
- Nvidia RTX Voice – Best for Streamers (If You Have an RTX GPU)
If you have an Nvidia RTX graphics card, you already have one of the best noise cancellation tools. RTX Voice removes background noise from your mic and even from other people’s voices, which is a game-changer for Discord and Twitch streaming.- Real-world test? I blasted a YouTube video at full volume, and RTX Voice filtered out everything except my voice.
- Downside? It’s GPU-intensive, so if your PC is already struggling, it might cause performance drops.
- Discord & Zoom Built-in Noise Reduction
- Discord has Krisp built-in, so just enable it in Voice Settings.
- Zoom’s noise suppression works decently, but it butchers audio quality, especially if you’re using a studio-grade mic.
B. Audio Interface & Hardware Solutions
While software-based noise suppression is convenient, it’s not always perfect—sometimes, it distorts audio or lags on weaker PCs.
If you want zero-latency noise reduction, hardware solutions are the way to go.
- Using a Noise Gate in Audio Interfaces & Mixers
If you’re using an XLR microphone, your audio interface or mixer likely has a built-in noise gate. A noise gatemutes your mic when you’re not speaking, eliminating constant background hums.- Example: The GoXLR Mini has a built-in noise gate and equalizer, making it a favorite among Twitch streamers.
- Dedicated Hardware Noise Suppression (DBX 286s Preamp & Cloudlifter)
If you’re serious about broadcast-quality audio, hardware preamps like the DBX 286s provide crystal-clear voice processing with noise suppression. But let’s be real—it’s overkill for casual users.- The downside? It costs around $200-$250, and it’s not plug-and-play—you need to fine-tune it.
Which One Should You Use?
If you just need quick noise suppression, Krisp AI is the easiest option. If you’re a streamer with an RTX GPU, Nvidia RTX Voice is insanely good.
But if you’re serious about audio quality, hardware solutions like noise gates and preamps will give you professional-grade sound without any software lag.
No more background noise excuses—your audience will thank you. 🎙️
How to Remove Background Noise from Recorded Audio (Post-Processing)
Let’s be honest—sometimes, no matter how much we prep, noise sneaks into our recordings.
Maybe the neighbor’s dog had a meltdown, or a distant AC unit decided to hum like an off-key choir.
But don’t panic! Post-processing can work wonders in cleaning up your audio.
Free & Paid Audio Editing Software (Which One’s Right for You?)
There are two ways to remove background noise in post-production:
- Free software (great for beginners, but limited).
- Pro tools (AI-powered and precise but pricey).
- 🎧 Audacity (Free & Simple, But Not Perfect)
If you’re just starting out, Audacity is a lifesaver. It’s free, lightweight, and works on almost any computer. The built-in Noise Reduction effect is surprisingly powerful.- How it works: You select a “silent” portion of your recording (where the noise is most noticeable), let Audacity learn that as a Noise Profile, then apply the reduction across the whole track.
- The catch? If overdone, your voice may end up sounding like a robot stuck in a tin can. I once cranked the settings too high, and suddenly, I sounded like a bad AI assistant. Moral of the story? Use it sparingly—start with a mild reduction (10-15dB) and tweak from there.
- 🎙️ Adobe Audition (Paid, But AI-Driven & Precise)
Now, if you want studio-quality noise removal, Adobe Audition is a game-changer. The Adaptive Noise Reduction tool is like a smart assistant that detects noise in real time and removes it without killing your voice.- Unique Perk: It has a Spectral Frequency Display—this is where things get sci-fi. You can see the noise visually as color bands and erase unwanted sounds surgically.
- The downside? It’s part of Adobe’s Creative Cloud subscription ($20.99/month). If you’re not using it daily, that’s a steep price.
- 🎵 iZotope RX (The Industry Standard for Pros)
If there’s one tool that can rescue even the worst recordings, it’s iZotope RX. Think of it as Photoshop for audio—it doesn’t just reduce noise, it removes things like clicks, hums, even reverb.- AI-Powered Magic: The Spectral De-noise tool is insane. It listens to your audio, figures out what’s noise vs. what’s your voice, and cleans it up without artifacts.
- Perfect for extreme cases—I once had a podcast recording where a loud café espresso machine was in the background. iZotope RX cleaned it so well, you’d think I recorded in a soundproof booth.
- The Catch? The good stuff isn’t cheap. The RX Standard version costs $399, and the RX Advanced version? A whopping $1,199. Unless you’re doing high-end production, it’s overkill.
Step-by-Step Noise Reduction in Editing Software
Now, let’s get to the step-by-step process of removing background noise like a pro. Here’s how to do it in three different software:
Audacity (Beginner-Friendly & Free)
- Open your recording in Audacity.
- Select a section with only background noise (no talking).
- Go to Effects > Noise Reduction > Click “Get Noise Profile” (this tells Audacity what to remove).
- Select your whole track > Apply Noise Reduction (Start with 10dB reduction, don’t overdo it!).
- Export the cleaned file!
Adobe Audition (AI-Powered Precision)
- Open your audio and go to Effects > Noise Reduction / Restoration > Adaptive Noise Reduction.
- Adjust the Noise Reduction slider (keep it between 30-50% for a natural sound).
- Use the Spectral Frequency Display (press Shift+D) to manually erase unwanted noise spots.
- Apply Parametric EQ to bring back lost clarity.
- Done! 🎉
iZotope RX (For Extreme Cases)
- Load your file into RX and open Spectral De-noise.
- Click Learn—it automatically detects noise patterns.
- Adjust Reduction Strength (aim for 3-6dB for best results).
- Use Dialogue Isolate if background chatter is an issue.
- Export and marvel at the difference.
Final Tip: When NOT to Use Noise Reduction
- If your voice starts sounding “metallic” or “underwater”—dial it back!
- If your noise is complex (music, overlapping voices, echoes), no software can fully remove it without affecting your voice.
- Sometimes, the best fix is re-recording. No software can fix a mic placed next to a roaring fan.
The Bottom Line: Which Noise Reduction Tool Should You Use?
Audacity (Free & good for beginners)
Adobe Audition (Best for podcasters & content creators)
iZotope RX (For extreme, professional-grade audio repair)
👉 My personal favorite? Adobe Audition—it’s the sweet spot between powerful AI cleanup and not breaking the bank.
But if you’re dealing with seriously bad noise, iZotope RX is pure magic.
What’s the worst background noise you’ve ever had to deal with?
Drop it in the comments—I’d love to hear your horror stories! 🎙️👀
Common Mistakes & How to Avoid Them
Let’s be real—removing background noise isn’t just about slapping on a noise reduction filter and calling it a day.
I’ve learned that the hard way. The first time I tried fixing a noisy recording, I cranked up the noise reduction in Audacity, only to end up sounding like a robotic AI assistant.
🤖 Trust me, you don’t want that. Here are some common mistakes (that I, too, have made) and how to avoid them.
1. Overusing Noise Reduction (A.K.A. The “Underwater” Effect)
One of the biggest mistakes? Going overboard with noise removal.
If you push noise reduction too far in software like Adobe Audition or iZotope RX, your voice starts sounding hollow, like it’s trapped in a fishbowl. 🎣
The trick is to find the sweet spot—removing just enough noise without destroying vocal clarity.
💡 Fix:
- In Audacity, don’t set noise reduction above 12 dB unless absolutely necessary.
- In iZotope RX, use Spectral De-noise but keep the reduction strength below 30% for natural audio.
- Record a clean sample of background noise first, so the software knows what to remove (this is called a noise profile).
2. Using a Cheap Mic & Expecting Studio-Quality Sound
I once bought a $15 condenser mic on Amazon, thinking I’d hacked the system.
Yeah…
that didn’t work out.
Cheap microphones don’t just pick up noise—they amplify it.
The mic I used had a horrible self-noise level (around 28 dB, which is awful compared to pro mics at 10-15 dB).
That means even in a silent room, it sounded like I was recording next to a jet engine.
💡 Fix:
- Invest in a dynamic microphone like the Shure SM58 or RØDE PodMic if you’re in a noisy environment.
- Check the mic’s self-noise rating before buying—lower is better (below 15 dB is ideal).
- Use a USB or XLR mic with a noise gate, like the Elgato Wave:3, which has built-in Clipguard to prevent background hiss.
3. Ignoring Room Acoustics & Relying on Software
Let’s talk about the biggest rookie mistake—assuming software can fix everything. If your room is an echo chamber, no AI noise filter can save you.
I made this mistake when I first started recording. I was in a bare-walled office with hard floors.
The result?
My voice bounced around like I was shouting in a public bathroom. 🚽
💡 Fix:
- Soft surfaces absorb sound—use rugs, curtains, bookshelves (yes, even books help).
- DIY Hack: If you’re on a budget, throw a thick blanket over yourself and the mic—it actually works!
- Best investment: Foam panels ($20 on Amazon), but don’t cover the whole wall—scatter them for balanced acoustics.
4. Using Noise Gates Wrong (Choppy Audio Alert!)
Noise gates are lifesavers, but they can backfire. Ever heard a voice cut in and out randomly?
That’s because the gate was set too aggressively, chopping off soft speech sounds.
I once set a noise gate too high while streaming, and half my words disappeared.
My chat thought I was having internet issues. 😅
💡 Fix:
- Set the threshold just above your background noise level (start with -40 dB and adjust).
- Attack & release times matter! Too fast, and your voice sounds clipped; too slow, and noise leaks in. Try 10ms attack, 100ms release.
- If using OBS, enable the Expander filter instead—it’s smoother than a noise gate.
5. Forgetting About Electrical Noise (That Annoying Buzz!)
If you’ve ever had a low humming sound in your audio, it’s probably electrical interference.
This happened when I plugged a cheap USB mic into a badly shielded PC port—instant ground loop noise.
Some mics, like the Blue Yeti, are notorious for picking up electrical interference from power sources.
💡 Fix:
- Use a powered USB hub for USB mics to reduce interference.
- For XLR mics, get a Hum Eliminator (like the Ebtech Hum X).
- Move your mic cable away from power cables—this simple trick fixed 80% of my noise issues!

Conclusion
So, there you have it—a full guide to removing background noise from your mic! If you’ve ever cringed at a recording ruined by static, fan hums, or your neighbor’s dog, I feel your pain. 🎙️
✔ Prevention beats fixing—a good mic (like the Shure SM7B for studio or Rode NT1 for ultra-low noise) matters more than software tricks. But don’t fall for cheap “AI noise-canceling” mics—they often sound robotic.
✔ Environment is key—I once recorded with a $1,000 Neumann TLM 103, but street noise ruined it. A $50 dynamic mic in a treated room would’ve been way better.
✔ For live calls/streaming, Krisp AI & NVIDIA RTX Voice work well but can over-filter, making voices muffled. Test settings to balance clarity.
✔ Post-processing helps, but don’t overdo it—Audacity’s noise reduction is simple but harsh, Adobe Audition’s Adaptive NR is better, and iZotope RX is top-tier but pricey.
Final Thought? The best noise reduction is a quiet space, a good mic, and light software cleanup.
Into Podcasting? Podcasting is a different game, and without a precise blueprint, the game will get tougher midway. Grow your podcast from scratch with Zero Audience and learn about how successful podcasters cracked the code by winning our Free Guide with step by step Guidelines.
Get your complete podcast equipment setup by visiting Podcast Equipment Bundle. Don’t let the side projects kill your time. Get in touch with podcasting services and experts those will save you tons of time at Podcast Production Services.
With that being said, Let’s connect with all such free and paid tool/services you might need knowingly or unknowingly to fuel your growth. Here’s 21 BEST AI TOOLS AND PLATFORMS TO GROW YOUR PODCAST AND CONTENTS. There are some bonus tools in the end too to make your day to day life easier.
There are some affiliate links on this page that will redirect you directly to the original products and services. Also by buying through those links you will be supporting us. So thank you ^.^