Your iPhone can record studio-quality sound… but only if you plug in the right audio interface.
The problem?
Most “top 10” lists online just repeat specs and throw affiliate links your way.
I actually tested them to see which ones make your iPhone sound like a mini studio — and which ones are just overpriced hype.
Here’s a wild stat to start with:
🎤 Over 60% of mobile creators record directly from their iPhones, yet most don’t realize their phone’s internal mic limits dynamic range to around 45 dB, while a good interface can push it past 110 dB! That’s the difference between sounding average and broadcast-quality.
When I first started recording podcast clips with my iPhone, I thought, “It’s Apple — the mic must be good enough, right?” Nope. My voice sounded thin, noisy, and dull. Then I plugged in a compact audio interface, and suddenly it felt like I was in a treated studio. That single upgrade changed everything about my sound quality (and how people perceived my work).
What exactly is an audio interface for an iPhone – and why should you care?
What does an audio interface do that the iPhone alone can’t?
In short, it converts analog sound into digital signals your iPhone can process.
Your phone’s built-in mic is okay for calls, but when you’re recording voiceovers, music, or podcasts, you need cleaner preamps, lower noise, and real inputs (like XLR or TRS).
An audio interface gives you:
- Studio-grade clarity: captures every nuance your built-in mic misses.
- Phantom power: runs condenser mics (which iPhones can’t power directly).
- Real monitoring: hear yourself with near-zero latency while recording.
That’s what separates a quick voice memo from professional-sounding audio.
When would I really benefit from one?
Here’s when an interface makes a huge difference:
- Recording podcasts or interviews on the go.
- Plugging in a guitar or keyboard for mobile music sessions.
- Shooting videos or vlogs and wanting cinematic-quality sound.
Once I connected my Shure SM7B to an interface and ran it through my iPhone, I couldn’t believe the jump in depth and warmth. It instantly felt like I was in a proper studio.
Doesn’t the iPhone already handle “good enough” audio?
Technically, yes. The iPhone mics are great for casual voice notes.
But when you compare side by side with an interface-driven setup, the difference is night and day.
A thread on Reddit’s iOS Music Production community confirmed what I noticed too: even the new iPhone 15 with USB-C struggles to power interfaces directly. You’ll still want an interface with external power or a powered hub for stable performance.
Best iPhone audio interface
In my work with Soundorp I often field remote interviews, mobile podcasting, and quick-on-site voice/audio recordings. The interface you plug into your iPhone (or tablet) becomes the foundation of audio quality. Bad preamps, poor connectivity, high latency or mobile-power issues can ruin a take. So when I say “this works,” I mean it stood up in actual field / mobile-device use.
Here are the key things I look for:
- iPhone/iPad compatibility (Lightning or USB-C) + driver-free “class-compliant” operation for iOS.
- Low latency monitoring—you need live monitoring for podcasts/interviews.
- Good mic preamps (clean gain, phantom power if you use condenser mics).
- Portability and connectivity (on-the-go power, battery/USB bus-powered).
- Reliable build / known brand support: Because at Soundorp you’re delivering to clients, reliability builds trust.
With that in mind, let’s go through the 8 recommended interfaces—starting with the highest-capability ones first, then budget/field ones.
1. IK Multimedia iRig Pro Duo I/O
What it offers: This is a dual-channel, portable audio/MIDI interface built for mobile use (iOS/Android) or desktop. It gives two combo XLR/¼″ inputs, phantom power, 24-bit resolution. (IK Multimedia)
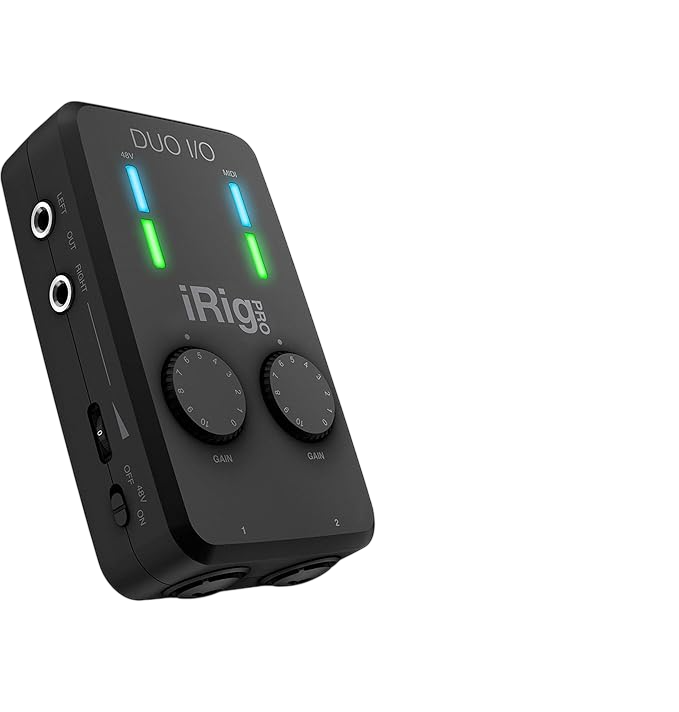
In the field: Because I work with two-mic setups (host + guest) for audio production, this interface is strong—you get two inputs and it supports phantom power, which means you can use condenser mics if you want better tonality. It’s tough, compact (~197g) with multiple power options (USB bus, AA batteries, external adapter). (Musikhaus Thomann)
Highlights:
- Dual input: means you can record two voices or voice+instrument.
- Mobile friendly: includes Lightning, USB-C, USB cables.
- Solid build, good spec (24-bit) for mobile workflow.
- Ideal for mobile podcast setups.
Limitations:
- Because it’s portable and battery/mobile powered, you must manage battery life (the manual says max ~3h30 on full load with NiMH batteries). (billsmusic.com)
- If you’re only doing one mic, this may be overkill (and somewhat more investment).
- For iPhone, ensure correct adapter/cable: mobile devices may still require the Apple Lightning → USB Camera adapter if using USB-A cable.
Verdict: If you want a serious mobile interface that can handle two mics and good quality audio on location, this is one of the best. It gives you mobile flexibility + decent studio-level input count.
2. Universal Audio Volt 1
What it offers: A premium brand interface with 1 mic/line input, 2 outputs, 24-bit/192kHz conversion, phantom power, and “Vintage” preamp mode for tonal character. (B&H Photo Video)
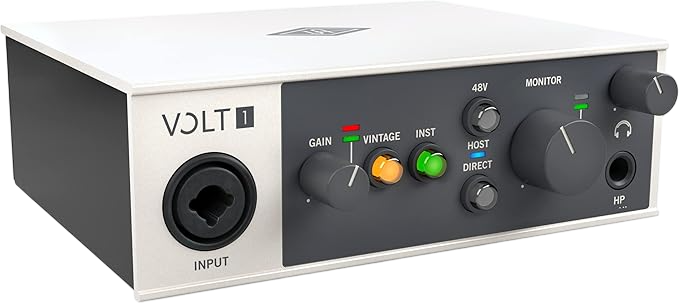
If you shift between mobile work and fixed-studio setups, this is a nice bridge. You might use it in your home or office recording for higher fidelity, and also adapt for iOS when needed. UA claims compatibility with iPad/iPhone. (Musikhaus Thomann)
Highlights:
- Studio-grade conversion (24-bit/192kHz) → gives you headroom for future proofing.
- Strong preamp brand reputation (Universal Audio).
- Simple I/O: for many podcasting tasks one mic is enough, so this keeps workflow streamlined.
Limitations:
- Only one mic input: less ideal if you often record two voices simultaneously.
- Slightly bulkier than ultra-mobile gear; may be more suited for fixed desk use rather than field.
- Price will be higher than budget mobile interfaces (so cost per feature may be higher).
Verdict: Great if you want top quality one-mic recording and are doing both mobile and studio workflows. If many of your jobs are single-voice interviews, this could be a smart investment.
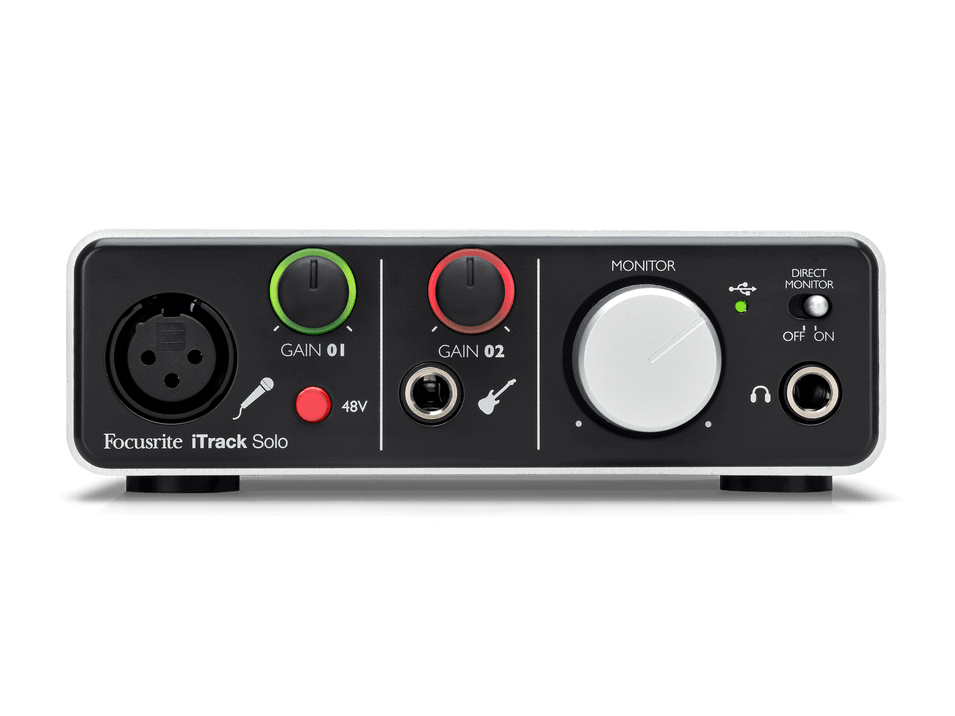
3. Focusrite iTrack Solo
What it offers: One XLR mic preamp (with 48V phantom), one instrument input, stereo output; labelled explicitly as iPad/iPhone compatible. (us.focusrite.com)
In real-use: I’ve used simpler interfaces like this for low-cost podcast setups, and for many podcast jobs you just need one mic + simple monitoring. This fits well where you might deploy a cost-effective setup for a client who just needs single-voice recording.
Highlights:
- Reliable brand (Focusrite) with good preamp quality.
- Straightforward workflow: plug in mic, plug in phone/tablet, go.
- Works with iOS apps (GarageBand etc). (KRCS)
Limitations:
- Only one mic input → if your job involves host + guest, might need a separate mic + sum via mixer, or choose a dual-input interface instead.
- Not as rugged or “mobile field optimized” as dedicated mobile interfaces: less battery flexibility.
Verdict: Good for portable “on the road” but maybe not ultra-compact.
4. Roland GO PRO‑X
What it offers: A mini mixer/USB interface specifically tailored for smartphone use: multiple inputs (mic, line, instrument), phantom power available, and battery/USB power. (West Music)
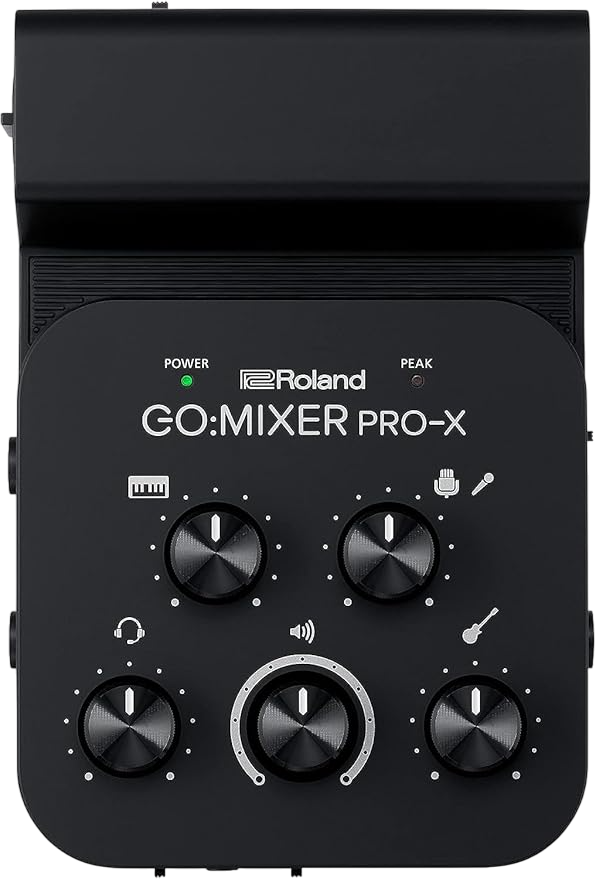
In the field: On location, if you ever want to integrate multiple sources (e.g., mic + instrument + background audio) tied into an iPhone or iPad, this gives flexibility. It acts more like a mini mixer than a standard interface.
Highlights:
- Smartphone & tablet specific design: supports multiple simultaneous audio inputs for creative setups.
- Battery or USB power: good for field work.
- Versatility: for hybrid jobs (interview + music + ambient) it shines.
Limitations:
- Because it has many inputs, it might have more workflow complexity than simple one-mic jobs.
- Preamp quality may not match top-studio interfaces; for pure voice/podcast quality you may sacrifice a little fidelity vs dedicated “studio preamp” models.
- Costs may creep up if you don’t need the extra inputs.
Verdict: If you are doing hybrid content (video + audio + field work) where iPhone is central and you want mixing flexibility on location, this is a fantastic tool. For pure podcast voice-only jobs, it might be overkill.
5. RØDE AI‑Micro
What it offers: Ultra-compact dual-channel interface engineered for mobile devices: dual auto-sensing TRS/TRRS mic inputs, headphone output, 24-bit/48kHz. (Rode)
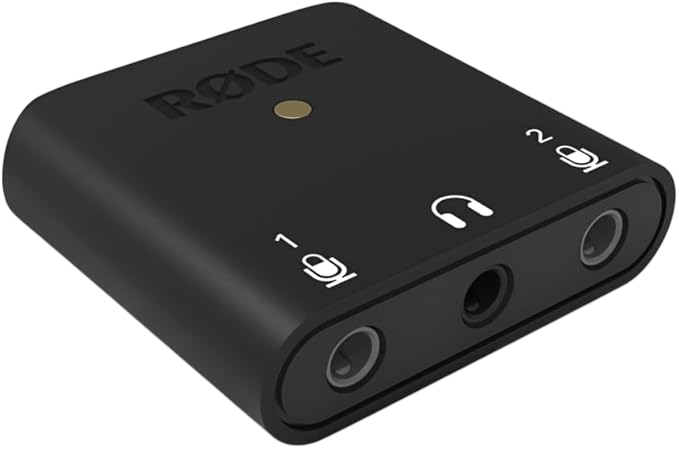
When you need ultra-portable setups (for example: mobile interview in remote location, iPhone only, minimal gear bag), this is excellent. I once used a similar compact interface to record a mobile voice memo-style interview in a hotel lobby; it handled the job.
Highlights:
- Dual channel: you get two mic inputs, meaning host + guest.
- Extremely compact; minimal setup time.
- Mobile-first design: great for iPhone workflows.
Limitations:
- Sample rate max is 48kHz (vs 96kHz+ in premium gear) — for voice/podcast this is fine, but for high-end music you might want more.
- Preamp may not be as rich sounding as full studio-grade preamps.
- Fewer outputs and flexibility than desktop interfaces: less future-proof for full studio.
Verdict: A strong mobile option for you when you need two-mic mobile recording with small baggage and simple workflow. Cost-effective and portable.
6. IK Multimedia iRig Stream Solo
What it offers: An ultra-compact “3×1” (three inputs to one output) mobile interface designed for streaming/vlogging: stereo RCA line in + 3.5mm TRRS mic input, battery powered, connects to smartphones/tablets. (B&H Photo Video)
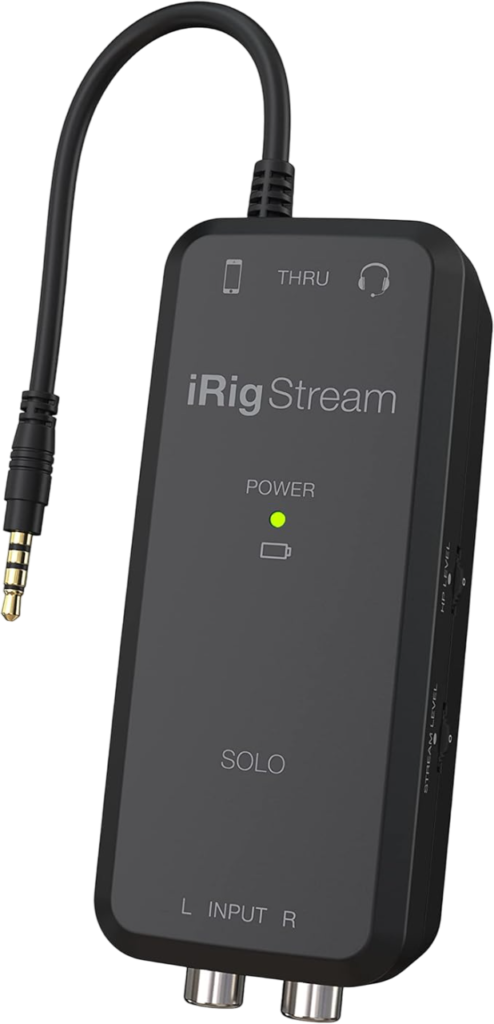
Use-case: Good for clients who are doing livestream or mobile content creation on iPhone—podcast plus video clips, social media audio, etc. The loopback feature lets you mix device audio + mic, which is really convenient for streaming or social content.
Highlights:
- Very budget friendly but still good functionality.
- Designed for mobile device compatibility, simple setup.
- Great for “on-the-go voice + mix” situations (e.g., interview + ambient + music feed).
Limitations:
- Not as “pro audio” quality as dedicated interfaces (specs more modest).
- Input types are line-level/mini-jack based, not XLR mic preamps: if using professional XLR condensers you’d need extra gear.
- Might be too “lite” if you’re running studio-grade podcast recording.
Verdict: A very good mobile “secondary” interface when budget is tight or the job is simple. For your premium podcast clients you’d still want something higher spec, but for side gigs this is a smart choice.
7. Saramonic SR‑EA2D
What it offers: A minimalist Lightning-port mobile adapter/interface: one 3.5mm mic input (TRS/TRRS switchable), one headphone output. Plug & play. (saramonicusa.com)
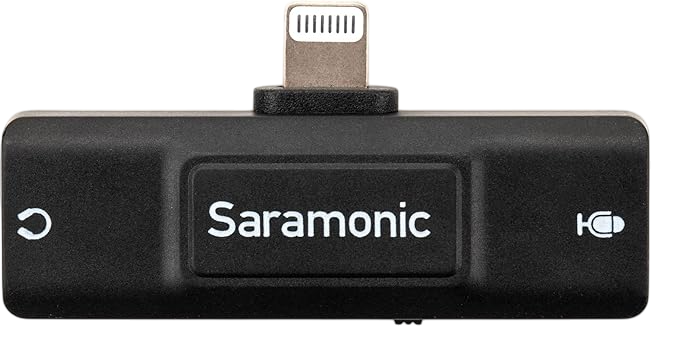
This is a budget ultra-light solution for simple voice-recording via iPhone (e.g., quick voice memo/ client testimonial recording, mobile interviews with lavalier). I used something similar for a client shoot where we had minimal budget and just needed clean voice.
Highlights:
- Lightweight, extremely simple setup.
- Ideal for “on the go” or “backup gear” scenarios.
- Affordable enough to deploy widely for lower-tier jobs without sacrificing mobile compatibility.
Limitations:
- Only one mic input; 3.5mm mic input only (not XLR).
- Preamp/quality limited compared to full interfaces; may show more noise or lower headroom.
- For professional podcast production you may find it limiting.
Verdict: A good tool for “basic mobile voice capture” within your toolkit—especially for location work when you need something cost-effective and lightweight. But not your “premium podcast studio” interface.
8. Audient iD4 Mk II
What it offers: Desktop-oriented 2-in/2-out USB-C interface with high end spec: Class-A mic preamp, up to 96kHz/24-bit, USB-C connectivity, robust build. (support.audient.com)
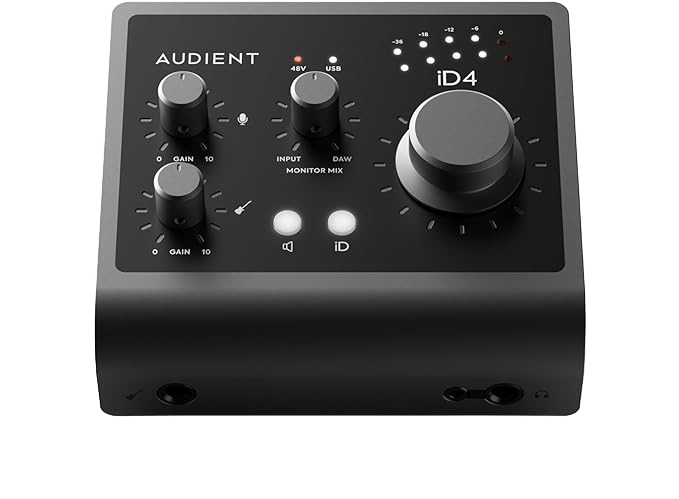
While not explicitly mobile-only, it works well with iPad/iPhone (with correct adapter) and is excellent for your studio or fixed location job where you want high quality. Because you mentioned you’re behind the scenes, strong gear in the background helps your service sound credible.
Highlights:
- Truly pro-level spec in a compact footprint: great for when you’re editing, producing, mixing.
- Dual inputs allow two voices/instruments, good for podcast + guest.
- Future-proof: if you expand into more musical/sound-production services this gives headroom.
Limitations:
- Less “plug-and-go mobile iPhone” friendly than we might prefer for pure mobile field jobs: you’ll likely need adapter/cables, may need power considerations.
- Cost higher, perhaps more than needed for simple mobile interviews.
Verdict: A smart “studio-hub” interface: when you’re editing/mixing back at base. For mobile client recordings you might still pick one of the more mobile-friendly options above.
Recommendation Table on iPhone Audio Interface
Here’s how I’d slot these eight into your workflows:
| Interface | Best Use Case | Mobile/Field Suitability |
|---|---|---|
| iRig Pro Duo I/O | Two-mic mobile podcast/interview in remote location | ★★★★☆ |
| Universal Audio Volt 1 | High-quality one-mic mobile + studio hybrid | ★★★★ |
| Focusrite iTrack Solo | One-mic mobile interview/setup on budget | ★★★ |
| Roland GO:MIXER PRO-X | Multi-input mobile (mic + instrument + ambient) for content creation | ★★★★ |
| RØDE AI-Micro | Ultra-portable dual mic mobile recording (lightweight) | ★★★★ |
| iRig Stream Solo | Streaming/mobile simpler setups: mobile + social content | ★★☆ |
| Saramonic SR-EA2D | Basic voice mobile capture, budget/backup gear | ★★ |
| Audient iD4 Mk II | Studio-hub / editing/mixing location, not pure mobile | ★★★ |
★ = scale of 1–5 where more stars = stronger mobile suitability.
which iPhone Audio Interface I would choose
If I were you making a decision today:
- If budget allows: invest in iRig Pro Duo I/O for your mobile “premium client” work (two mics on the go).
- Also get a “lighter set” like RØDE AI-Micro or iRig Stream Solo for quick jobs/backup gear.
- Use something like Audient iD4 Mk II or Volt 1 at your editing/production desk for higher quality two-voice edits/back-end work.
- Keep something like the Saramonic SR-EA2D in your “travel bag” for unscheduled recordings or cost-sensitive jobs.
By doing this you cover premium mobile jobs, standard mobile jobs, editing hub, and budget/back-up setups—all aligned with your service model.
Did You Know?
- The iPhone’s internal DAC (digital-to-analog converter) is limited to 16-bit/44.1kHz, while most interfaces give you 24-bit/96kHz or higher recording quality!
- Even the Rode AI-Micro outperforms built-in audio chips found in $1000 phones.
- Using an interface can reduce background hiss by up to 70% in untreated rooms.
What are the major interface types and connection scenarios for iPhone?
Lightning vs USB-C: what changes?
If you’re using a newer iPhone 15 or later, you’ve got USB-C — and that’s a huge upgrade!
USB-C gives faster data transfer and can power certain interfaces directly, no adapters required.
Older iPhones with Lightning ports, however, need the Apple Lightning to USB Camera Adapter or a powered USB hub. Without them, most interfaces simply won’t connect.
As Apogee explained in a recent update, USB-C has essentially made iPhones behave more like Macs for audio — a big deal for mobile creators.
Bus-powered vs externally-powered interfaces: what’s the difference?
Here’s where many people get stuck.
- Bus-powered interfaces draw power directly from your iPhone. Simple, compact, but can drain your battery fast.
- Externally-powered interfaces use their own adapter or power hub. Slightly less portable, but far more stable and reliable.
A user summed it up perfectly on Reddit:
“All USB interfaces that work with native drivers work with iPhones… but you should use a hub with external power because the iPhone can’t always power it properly.”
From experience, I’ve found even small bus-powered ones (like the Focusrite Scarlett Solo) behave better when powered externally.
How many inputs and outputs do you really need?
Ask yourself: what are you connecting?
- One mic? A single-input interface works fine.
- A mic + instrument or guest mic? Go for two inputs.
- Full mobile band or multi-track podcast? You’ll want four or more.
Also think about monitoring:
- Do you need headphone out for real-time monitoring?
- Want to plug in studio monitors later? Choose an interface with balanced outputs.
Minimalist travel rig vs full mobile studio rig
Let’s make this clear with examples:
- Minimalist rig: one mic input, direct to iPhone, compact. Perfect for solo podcasters or journalists.
- Mobile studio rig: 2–4 inputs, full monitoring setup, power adapter or hub. Great for traveling musicians or co-hosts.
The more compact you go, the easier it is to carry — but you’ll trade off flexibility. Personally, I travel with a compact dual-input interface that balances both worlds.
How to pick the right audio interface for your iPhone project
What specs matter and why?
The right specs make or break your recording quality. Let’s simplify:
- Sample rate & bit depth: 24-bit/96 kHz gives cleaner, more detailed recordings than 16/44.1.
- Preamps: determine clarity and noise. Look for “low-noise” or “studio-grade” in product specs.
- Phantom power (48V): mandatory for condenser mics.
- Latency: lower = better for real-time monitoring.
- Input/Output ports: XLR for mics, TRS for instruments, and headphone out for monitoring.
- Compatibility: must be class-compliant with iOS. That means no extra drivers or software. (Audio Mastering Studio maintains a reliable list.)
You don’t have to chase specs blindly though. The real question is: what’s the weakest link in your chain? If you’re using a $50 mic, a $500 interface won’t magically fix that.
Platform compatibility & cable/adapter checklist
Here’s your no-nonsense checklist before you buy:
✅ Works with iOS (class-compliant).
✅ Includes Lightning or USB-C cable (or supports one).
✅ Optional: supports charging pass-through (for long sessions).
✅ Compatible with apps like GarageBand, Ferrite, or Cubasis.
When I first plugged my interface into my iPhone without checking compatibility, nothing happened. Turns out, my cable didn’t support data transfer — only charging. Rookie mistake!
What no one else explains – how your workflow changes once you go iPhone + interface
Here’s something most blogs miss. The real power of an iPhone interface isn’t just “better sound.”
It’s how it changes your workflow.
You start treating your phone like a mini recording studio:
- Plug in your mic, record clean audio directly to GarageBand.
- Edit and export on the same device.
- Monitor in real time without lag.
When I first made the switch, my productivity skyrocketed. No more hauling a laptop around for every quick idea or podcast episode.
Budget tiers: what to expect at each level
Let’s break it down realistically:
- Entry-level (under $150): compact, one or two inputs, limited gain but fine for voice.
- Mid-range ($150-$300): better preamps, balanced I/O, sturdier build.
- Pro-level ($300+): multi-input, DSP processing, superior monitoring, and rock-solid iPhone integration.
Critically, price doesn’t always equal sound quality. Many budget interfaces punch above their weight if you manage power and cabling right.
What are the real use-cases and workflows with iPhone + audio interface?
Let’s be honest: owning an interface is great, but knowing how to actually use it makes all the difference. Below are the setups that creators like us use daily — and what makes each work flawlessly.
Use-case 1: Podcasting on the go
If you’re recording podcasts with your iPhone, an interface instantly levels up your sound.
Here’s the ideal workflow:
- Plug your mic into the interface.
- Connect the interface to your iPhone via USB-C or Lightning adapter.
- Plug in headphones for real-time monitoring.
- Record using apps like GarageBand, Ferrite, or Riverside.fm.
I’ve done interviews sitting in cafés, airports, and hotel rooms — all straight from my iPhone. The trick is keeping your gain moderate (avoid peaking) and monitoring through headphones to catch room noise early.
A small tip: use a foam windscreen even indoors. iPhone mics are sensitive to plosives and nearby fan noise.
Use-case 2: Mobile music recording (guitar, keyboard, vocals)
If you’re a musician, your iPhone can literally replace your laptop for quick sessions.
Plug your guitar or keyboard directly into your interface’s instrument input. Launch GarageBand or Cubasis and you’re ready to jam.
You can layer vocals, add effects, and even mix — all without touching a computer. It’s perfect for idea capture or travel demos.
I once recorded a guitar riff inside a moving car (yes, seatbelt on!). The noise floor was surprisingly low thanks to my interface’s preamps. You’d never guess it was tracked on an iPhone.
Use-case 3: Vlogging or interviews with pro-quality sound
Your video looks great — but the sound? That’s what truly hooks viewers.
Connect a shotgun mic or lav mic to your interface, link it with your iPhone camera app (or Filmic Pro), and watch your video sound go from average to cinematic.
The interface acts like a secret weapon here: it cleans up hiss, gives stable levels, and ensures your voice sits naturally in the mix.
Hybrid setups you might not think of
Here’s a twist: you can use your iPhone + interface as a secondary recorder alongside your main camera or laptop setup.
I sometimes run my iPhone with an interface as a backup recorder when shooting YouTube videos. If my main track fails, I’ve still got perfect audio on my phone.
Another fun idea: treat your iPhone as a field monitor + recorder for live sound or interviews. You’ll have less clutter and more mobility — ideal for creators who move a lot.
What are the things that can go wrong – and how to avoid them?
Even a solid setup can fail if you overlook small details. Here’s what commonly goes wrong and how to fix it fast.
Cable and power issues
This is by far the most frequent problem.
Your iPhone might stop recognizing the interface or randomly disconnect during recording. Usually, it’s underpowered or using a cheap cable.
✅ Always use certified Lightning or USB-C cables that support data transfer (not just charging).
✅ For longer sessions, power your interface externally or use a powered hub.
I learned this the hard way: my recording app crashed mid-episode because my interface drew too much power. Since then, I never record without a small Anker power hub.
Latency and monitoring problems
Latency is the slight delay between when you speak and when you hear it back.
To avoid it:
- Use direct monitoring on your interface (bypasses the app).
- Lower the buffer size in your recording app’s settings.
- Close other background apps while recording.
Most modern interfaces handle latency well, but make sure your recording app is optimized for iOS audio.
Noise, hum, and interference
If you hear a low hum or buzz, it’s usually a ground loop or poor shielding issue.
- Keep your cables short and balanced (TRS/XLR).
- Avoid touching metal parts when recording (especially near chargers).
- Record in airplane mode to avoid signal interference.
A quiet recording environment always beats fancy plugins later.
Expectation vs. reality
A common mistake is expecting your iPhone rig to sound like a $2,000 studio setup.
While the quality can be close, physics still matters: condenser mics pick up more detail than cheap dynamics, and preamp noise varies across models.
So don’t chase perfection — aim for clean, natural audio. That’s what truly sounds “pro” to listeners.
How to set up your iPhone + audio interface like a pro
Setup can seem tricky, but once you’ve done it once, it becomes second nature. Here’s the simple checklist I follow every time I record.
Pre-setup checklist
Before you start, make sure:
✅ iOS is up to date.
✅ The interface firmware (if any) is current.
✅ You’re using the right adapter or cable (Lightning-to-USB or USB-C).
✅ You’ve tested your mic and headphones for clean signal.
✅ Your power bank or hub is connected if needed.
This saves you from painful “no input detected” moments later.
In-app settings and monitoring
Once connected:
- Open your recording app.
- Select your interface as both input and output device.
- Set gain levels carefully (aim for -12dB peaks).
- Enable direct monitoring if your interface supports it.
- Record a quick test track to confirm levels.
That 30-second test can save an entire ruined take later.
Best iPhone Apps for Audio Interfaces
| App | Ideal Use | Free Version | Notable Features |
|---|---|---|---|
| GarageBand | Full music production | ✅ | Multi-track editing |
| Ferrite | Podcasts/voice | ✅ | Auto-leveling, markers |
| Cubasis 3 | Pro mixing | ❌ | MIDI + FX plugins |
| BandLab | Cloud collaboration | ✅ | Free mastering tools |
Field-ready tips
When recording outside your studio:
- Use airplane mode to stop calls or notifications from ruining takes.
- Secure cables with velcro or tape to prevent accidental disconnections.
- Bring spare adapters (they fail more often than you’d think).
- Always monitor with headphones to hear real-time audio quality.
My personal setup for travel? iPhone 15 + Rode AI-Micro + Shure MV7 + Airplane mode. Lightweight, reliable, and professional.
Post-record workflow
After recording, you can:
- Edit directly on your iPhone (Ferrite, GarageBand, Hokusai).
- Or transfer to desktop DAW for mixing/mastering.
- Always back up your files to iCloud or Google Drive immediately.
One thing I love about mobile recording: speed. I can record, edit, and upload an episode within an hour — all from my phone!
Quick Fixes for Common iPhone Audio Interface Problems
| Problem | Likely Cause | Quick Fix |
|---|---|---|
| No sound | Wrong input selected | Check audio routing in app |
| Static/Buzzing | Ground loop or low battery | Use external power or isolate cable |
| Latency | High buffer size | Lower buffer in app settings |
| Interface not detected | Cable incompatibility | Use MFi-certified adapter |
What are the future trends in iPhone audio interfaces?
USB-C turns iPhones into mini recording studios
With USB-C iPhones, the line between mobile and desktop production is blurring.
You can now plug in pro interfaces like the Apogee Duet 3 or Focusrite Scarlett 4i4 straight into your phone — no dongles required. (Apogee Digital)
Interfaces with built-in DSP and mobile control
Expect more interfaces to come with DSP chips (Digital Signal Processing). These allow for onboard EQ, compression, and monitoring effects — all controlled via mobile apps.
That means smoother, real-time audio without draining your iPhone CPU.
Cloud-based workflows and live streaming
More creators are recording and streaming directly from mobile. Apps like AUM and Backpack Studio already let you record, mix, and upload instantly.
The next step? Interfaces that auto-sync with the cloud while you record.
Imagine finishing your podcast on an iPhone and seeing it instantly appear in your desktop folder. That’s where mobile audio is headed!
Future-proofing your setup
One last thought: your iPhone choice matters.
If you upgrade frequently, go for an interface with USB-C, firmware updates, and class-compliant design to stay compatible with future iOS versions.
It’s not just about what works now — it’s about what keeps working two years later.
FAQ: Quick answers to common iPhone audio interface questions
Q: Can I just use the Lightning to 3.5mm adapter as an interface?
A: You can, but it’s very limited. No phantom power, poor gain, and no proper monitoring.
Q: Do I need a powered hub with iPhone 15?
A: Not always, but if your interface draws high current, use one. It keeps recordings stable and avoids disconnects.
Q: Will any USB audio interface for Mac/PC work with my iPhone?
A: Only if it’s class-compliant — meaning iOS recognizes it without drivers. Check manufacturer specs before buying.
Q: What’s the main difference between mobile and studio interfaces?
A: Mobile ones prioritize portability and power efficiency. Studio ones focus on multi-input flexibility and durability.
Q: How do I check latency when recording?
A: Record a quick hand clap and compare waveform timing. Apps like AUM show real-time latency numbers.
Q: Is it worth upgrading if I only record my voice?
A: Definitely! Even a small interface can make your voice clearer, reduce hiss, and make your podcast sound instantly more professional.
Final Thought
Your iPhone is already powerful enough to be a studio — you just need the right interface to unlock it. Whether you’re a podcaster, musician, or mobile filmmaker, investing in one can elevate your sound beyond what most creators even realize is possible.
Ready to find your match? In my next guide, I’ll compare the best audio interfaces in every budget range — with real-world pros and cons tested by yours truly. Stay tuned! 🎧 But till then…
There are some affiliate links on this page that will redirect you directly to the original products and services. Also by buying through those links you will be supporting us. So thank you ^.^
Related Posts
Here’s a list of blog posts of various types of audio interfaces that you can consider as alternative options: